The old saying, “You never have a second chance to make a first impression,” is true-and it’s certainly true when it comes to your home’s front yard. After all, your front yard is what neighbors, friends, and family notice first about your home. What does your front yard say about you? Does your front yard complement your home, reflecting your unique style-or does it miss the mark?
If you’re ready to transform your ordinary front yard into something extraordinary, or you’re simply looking for landscape flower ideas, you’re in the right place. Take a look at these 75 landscape front yard pictures for a bit of inspiration, then contact us for a free consultation on turning your dream landscape into a reality.
1. When choosing a landscape company, talk with them about your goals and the first impression you want to create.
Do you want your space to feel like an English cottage garden, or are you looking for a modern, contemporary vibe? Are there landscape elements you want to highlight or downplay? Feel free to share landscape front yard pictures to help illustrate the kind of landscaping you like.

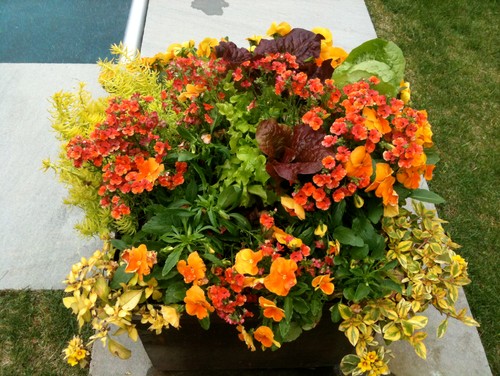
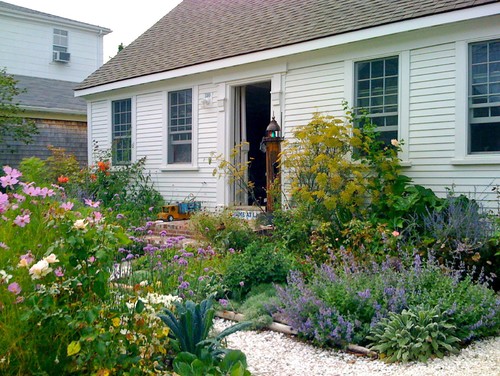
2. The little details can truly make your landscape garden design feel unique.
Here, planting colorful annuals in lattice flower boxes complements the larger theme of the overall front yard.

3. Remember, the front landscape should direct your eye to where you enter the property, either to the front door or to the area designated for parking.
Here, the home’s front entry is paved with Idaho Gold flagstone; the Whitacre Greer clay paver apron matches the driveway.

4. The landscape flower ideas for your front yard should set the overall theme for the entire property.
For example, upon seeing this traditional-style garden in the front yard, friends and family would anticipate seeing similar plants, hardscape materials, and details echoed in the back patio.

5. Use your hardscape elements to emphasize the main entry point you want guests to see, and avoid spreading a finite number of plants, hardscape, and architectural features to multiple areas in the front yard.
Here, colorful flowers, lush groundcover, and hardy shrubbery create complementary (but not competing) focal points for the yard, while all paths lead to the front steps.

6. When landscaping, all elements-even your mailbox-are open for interpretation.
This whimsical mailbox, planted with annuals, serves as a beautiful detail in the larger landscape-a perfect idea for those looking for landscape ideas for the front yard on a budget.

7. Your landscape should reflect your specific tastes, preferences, and even talents.
Here, cupola garden art made by the homeowner is the garden’s focal point.

8. Creating a layered effect with your landscaping allows you to naturally lead one’s eye to where you want it to go, shifting it from the grass and lower bedding plants to larger shrubs or ornamental trees.

9. When planning your front yard landscape, remember that it is typically viewed from a distance.
Dramatic, high-impact colors and textures will create the impression you’re looking for even when viewed from the road.

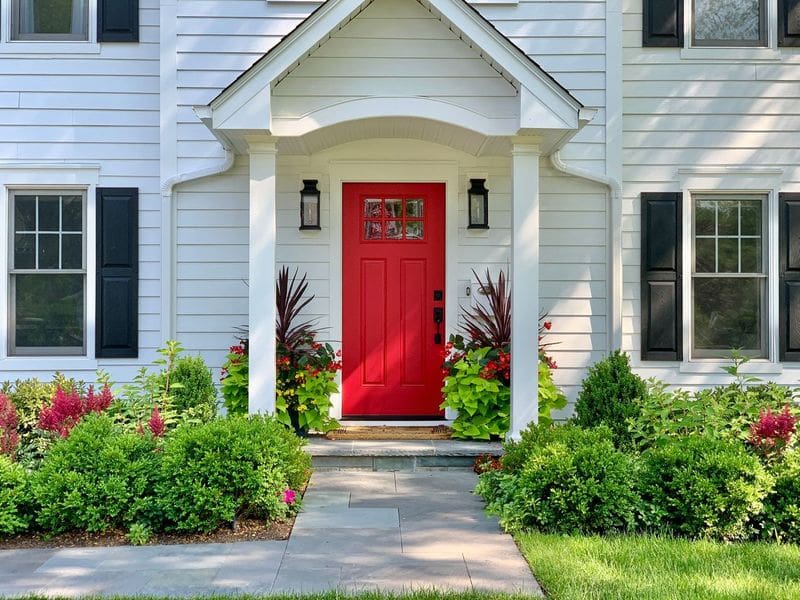
10. If the budget is a concern, concentrate the majority of your plantings in areas you want to emphasize.
Here, red Knockout roses in the forefront and close to the house provide a beautiful contrast with the lush green lawn and ground cover plantings.

11. Choosing shrubs for the front of the house is key to setting the tone for your landscape.
Here, the homeowner chose shorter varieties of shrubbery to help create a more formal-feeling front garden area.

12. A fountain can make a dramatic statement in a front yard.
Here, the front entry courtyard features a sunken urn water feature surrounded by bluestone and lined with cobbles.

13. When envisioning your landscape, remember that fewer types of plantings, larger groups, and a large sweeping layout will provide a more significant visual impact than a “onesie/twosie” plant layout with numerous standalone plantings.

14. Your driveway is an integral part of your landscape garden design for most homes, so it’s essential to pay attention to how it impacts your yard’s overall look and feel.
This crushed stone driveway-made from decomposed granite-complements the home’s exterior.

15. Aim to incorporate hardscape elements that complement each other and complement the home’s exterior.
Here, the decomposed granite path adds a casual touch of elegance while echoing the surface of the larger driveway.

16. For the best results, ensure that you integrate and create a similar landscape style as your home’s architecture.
Here, replacing the standard concrete drive with brick pavers that complement the home’s brick exterior gives the entire property an upgrade.

17. Combining straight lines and curves adds visual interest and allows the space to feel casual, warm, and welcoming.

18. Never underestimate the powerful beauty of a perfectly-manicured, lush green lawn.

19. Use light, height, color, and texture to help screen your home from neighboring properties and frame your residence to emphasize its unique architectural and landscape features.

20. The best driveway or entryway is both beautiful and practical.
Ensure that your driveway provides an appropriate field of vision for vehicular access and that you can easily enter/exit safely and without damaging your landscape.

21. Different textures can add interest and beauty to your garden.
Here, the glossy river rocks below the whimsical water feature add a lustrous sheen to the plant beds.

22. Containers allow you to easily change and maintain your landscape garden design without a lot of effort.
Here, terra cotta pots filled with plants of varying colors and textures help bring beauty to the patio.

23. Choose plants that complement your home, grow well in your landscape, and make you happy.
Here, giant Annabelle hydrangeas-a favorite of the homeowners-cheerfully greet friends and family.

24. Large swaths of a few plants provide a sense of intention and impact, adding to your home’s curb appeal.

25. Make the most of the space you have.
Here, an urban garden shines by taking advantage of plants with varying textures, colors, and heights.

26. Create a front yard cottage garden with a small circular patio.
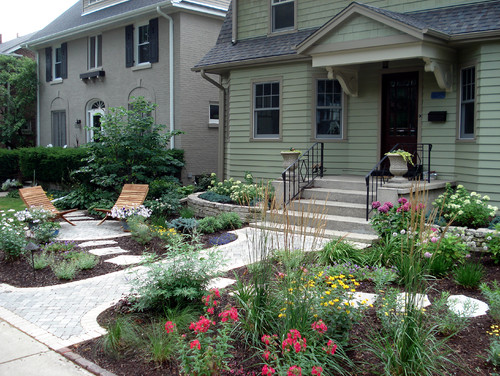 Photo by Nature’s Perspective Landscaping – Discover landscaping design ideas
27. Looking for unique landscape flower ideas? Intersperse edible plants (like nasturtium) along with flowering plants for a tasty, beautiful garden.
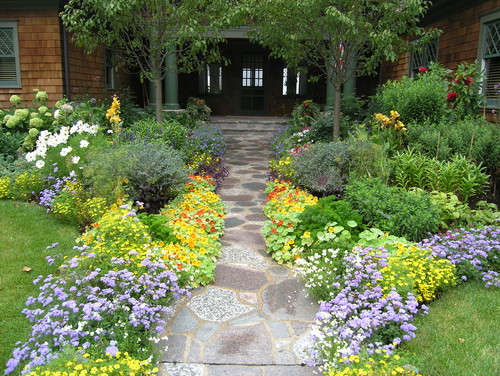 Photo by Heidi’s Lifestyle Gardens – Look for landscaping pictures
28. Add visual interest by including seasonal elements-for example, pumpkins and hay bales to help celebrate autumn.
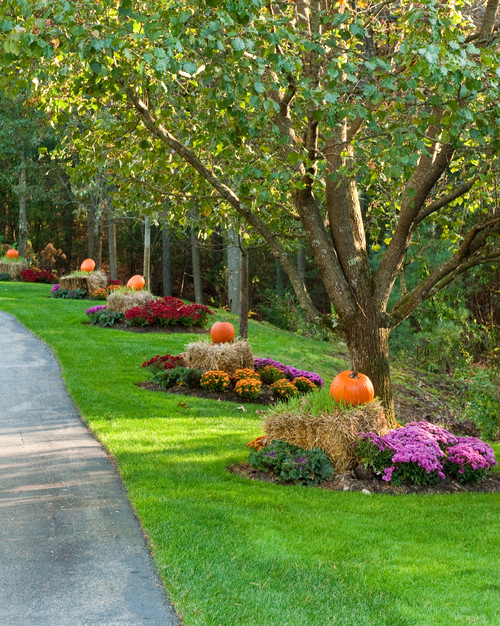 Photo by Mary Prince Photography – More landscaping photos
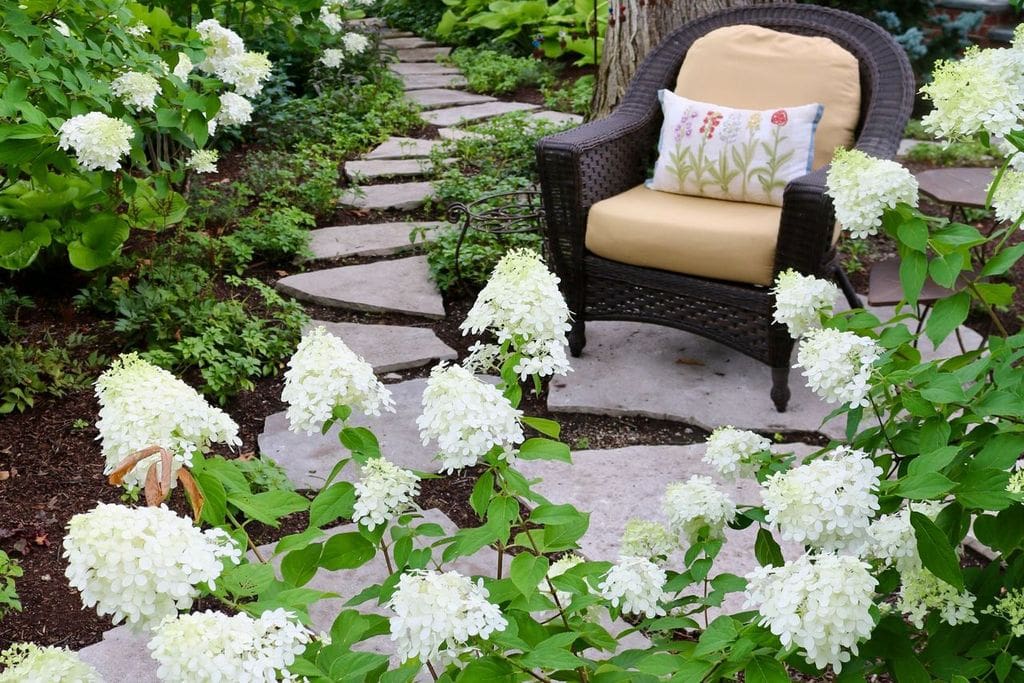
29. Create a comfortable, welcoming seating space by designating an area with crushed rock and stone pavers.
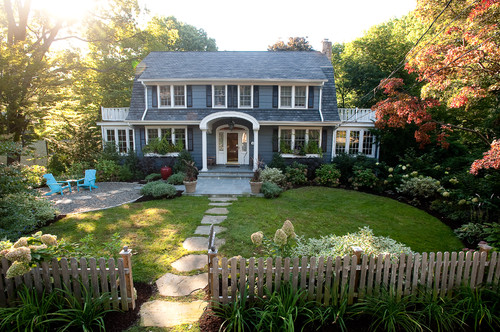 Photo by Westover Landscape Design – Search landscaping pictures
30. Frame a small front yard with a fence to separate the garden area from the parking area and the street.
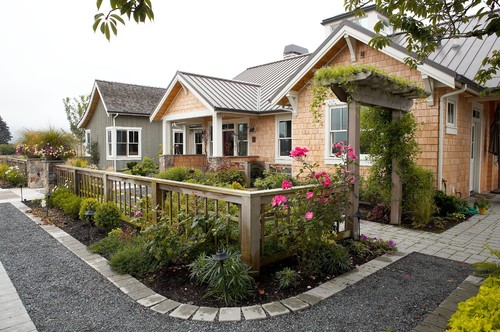 Photo by Lankford Associates Landscape Architects – Look for landscaping design inspiration
31. Forego a lawn altogether and make flowers, shrubs, and a stone walkway the focal point of your front yard.
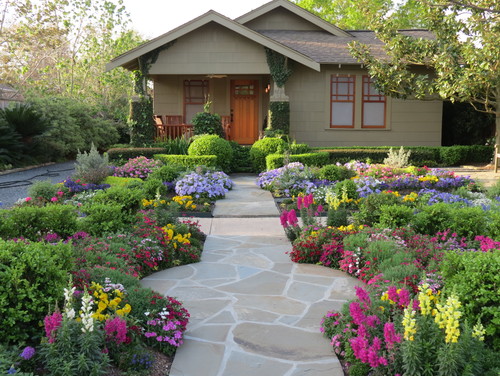 Photo by David Morello Garden Enterprises, Inc. – Discover landscaping design inspiration
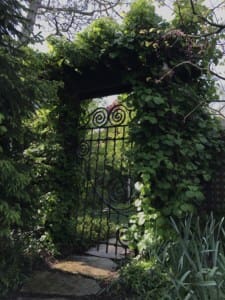
32. Adding an arch with trailing plants can create a beautiful, dramatic entryway for your home.
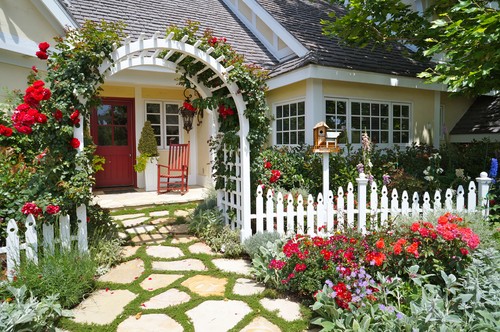 Photo by Moondrop Interiors – Discover landscaping design ideas
33. Break up a large driveway/walkway area with the addition of a beautiful, colorful garden oasis.
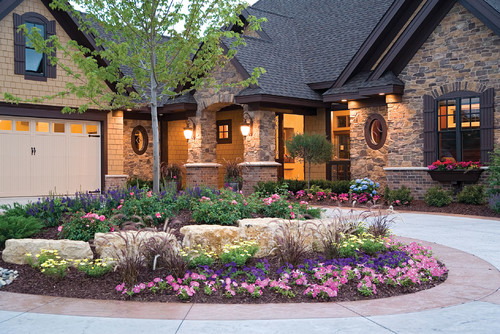 Photo by House Plans and More – Browse landscaping ideas
34. Complement the brick trim on your home with a driveway crafted from recycled clay bricks.
 Photo by Windsor Companies – Look for landscaping design inspiration
35. Tightly trimmed shrubs and hedges with clean lines add to the formal feeling of your home’s yard and garden.
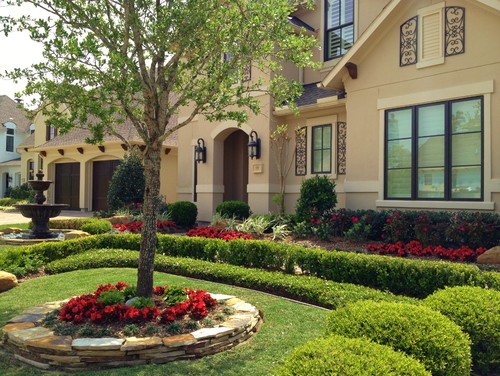 Photo by Designs By Elizabeth – Search landscaping design ideas
36. Create a less formal, more welcoming feel for your yard by planting beds in organic shapes.
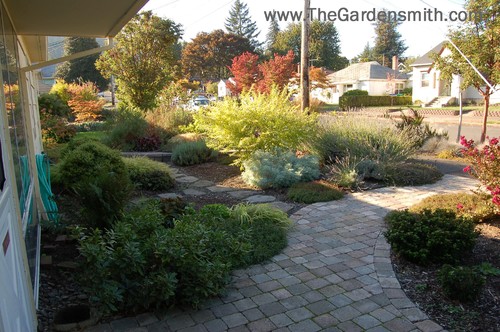 Photo by The Gardensmith – Search landscaping pictures
37. Iron fencing along with stone columns create an impressive entryway.
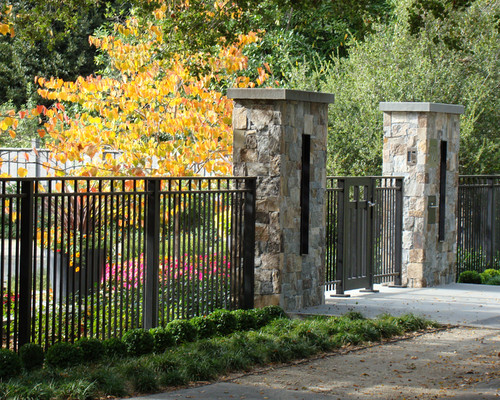 Photo by Randy Thueme Design Inc. – Landscape Architecture – Browse landscaping photos
38. A thoughtfully placed bench serves as a great place to enjoy the yard’s natural beauty.
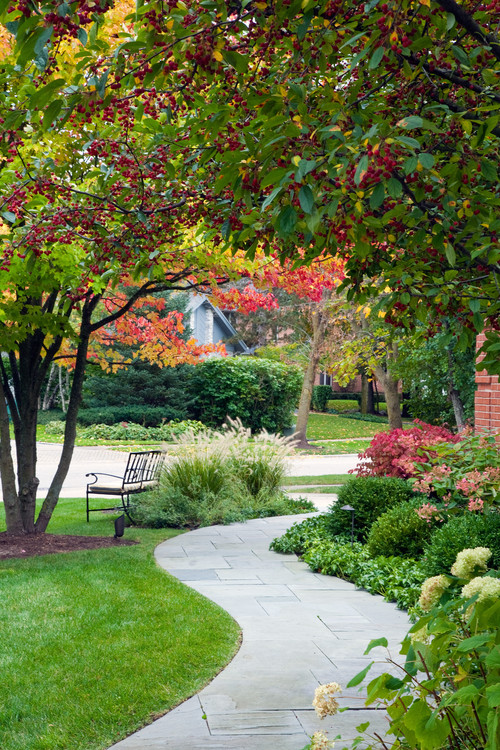 Photo by NLH Landscape Architects – Browse landscaping ideas
39. Add interest to a formal garden by adding a water feature.
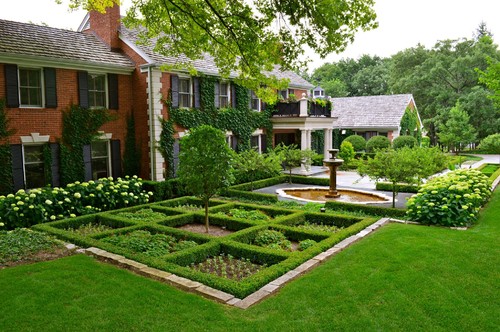 Photo by Doering Landscape Company – Discover landscaping design inspiration
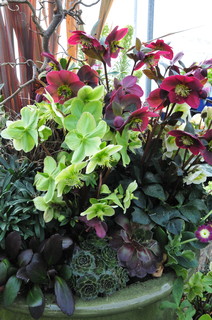
40. When choosing plants, consider adding varieties that will provide structure and beauty even during the chillier months.
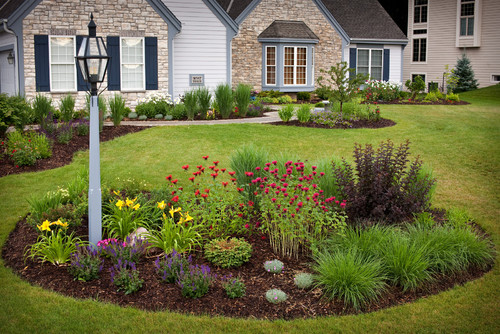 Photo by Ginkgo Leaf Studio – Discover landscaping design inspiration
41. Enjoy additional privacy and seclusion with a mix of mature trees and lush ground cover.
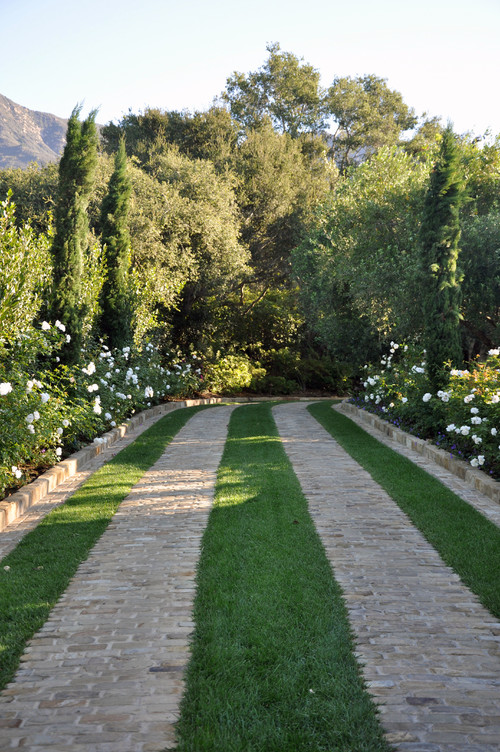 Photo by Arcadia Studio – Browse landscaping photos
42. The formal garden creates a sense of symmetry that complements the home’s symmetrical design.
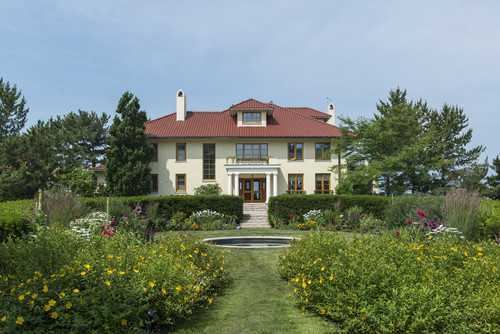 Photo by Huth Architects – Discover exterior home design ideas
43. Add a sense of whimsy to a formal garden by incorporating unusual shapes.
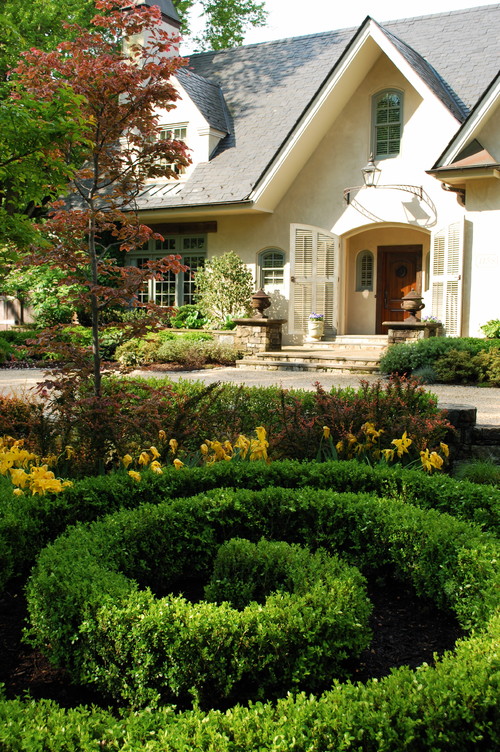 Photo by Wheat’s Landscape – Look for landscaping design inspiration
44. Give your in-town home the feel of a country estate with a large, circular driveway.
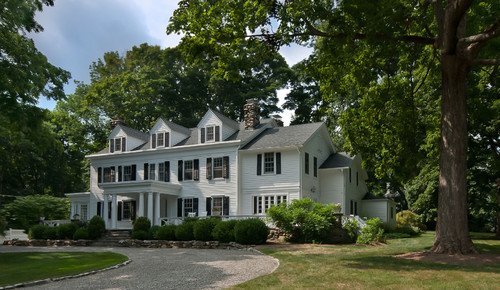 Photo by Fivecat Studio | Architecture – More exterior home photos
45. Irregularly cut stone creates a rustic, organic-feeling pathway.
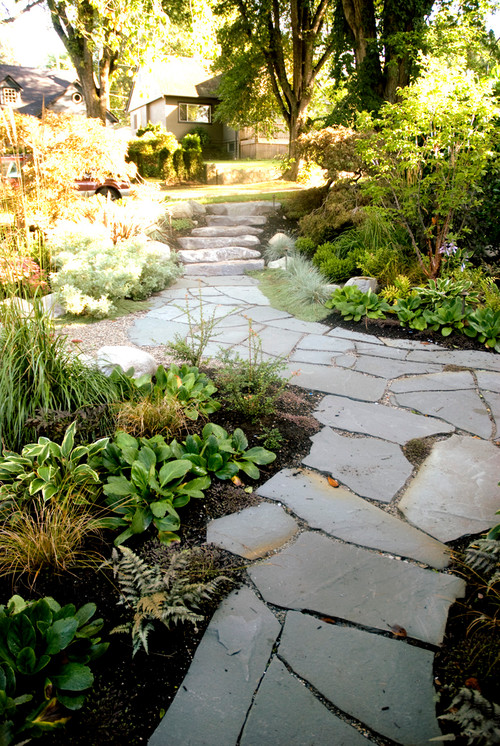 Photo by Aloe Designs – More landscaping ideas
46. For the greatest visual impact, ensure your modern home has a similarly contemporary landscape.
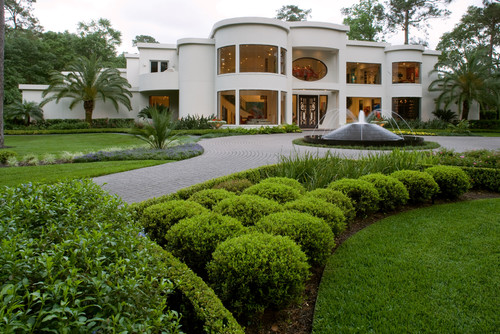 Photo by Exterior Worlds Landscaping & Design – Look for landscaping design inspiration
47. Use large stone pavers to create visual interest and provide a stepping stone pathway to the front door.
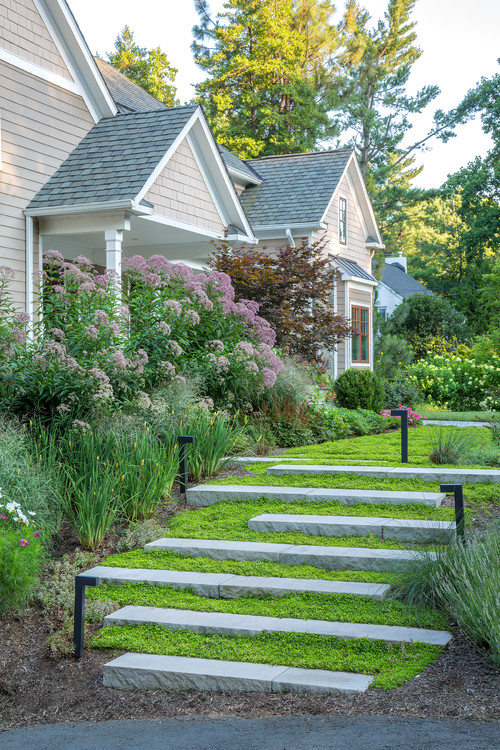 Photo by Scott Brinitzer Design Associates – Discover landscaping design inspiration
48. Remember to add lighting to your front yard landscape for both safety and visual interest.
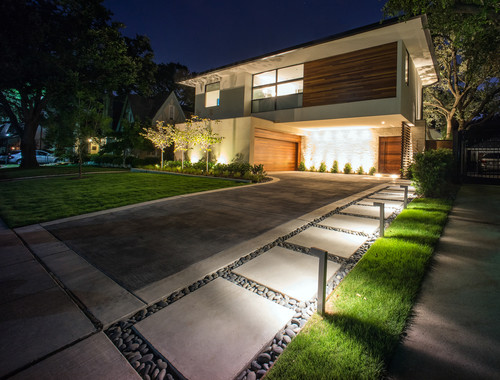 Photo by AquaTerra Outdoors – More landscaping ideas
49. To create a grand entrance, consider using different but complementary materials in your driveway.
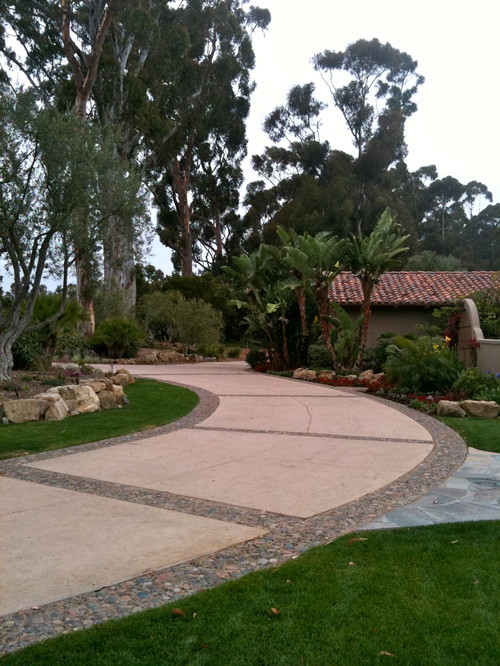 Photo by The Design Build Company – Discover landscaping design inspiration
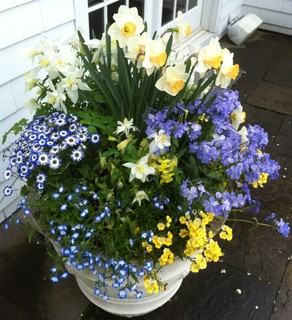
50. Choose a variety of annuals and perennials to ensure your garden has color and texture year-round.
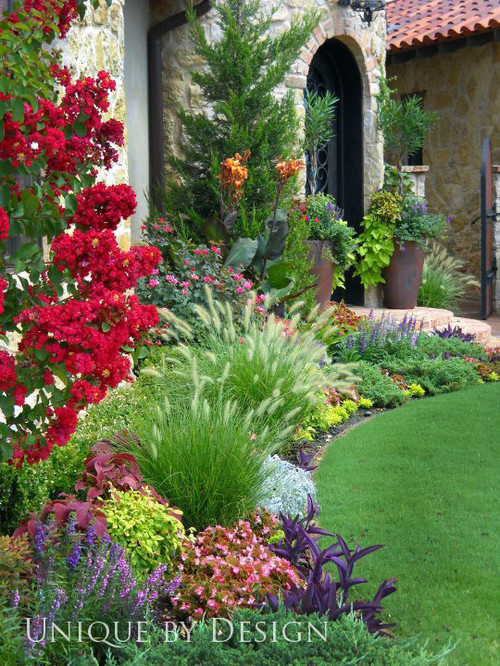 Photo by Unique by Design – Look for landscaping pictures
51. Consider using limestone to create a retaining wall that is both beautiful and functional.
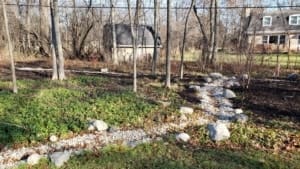
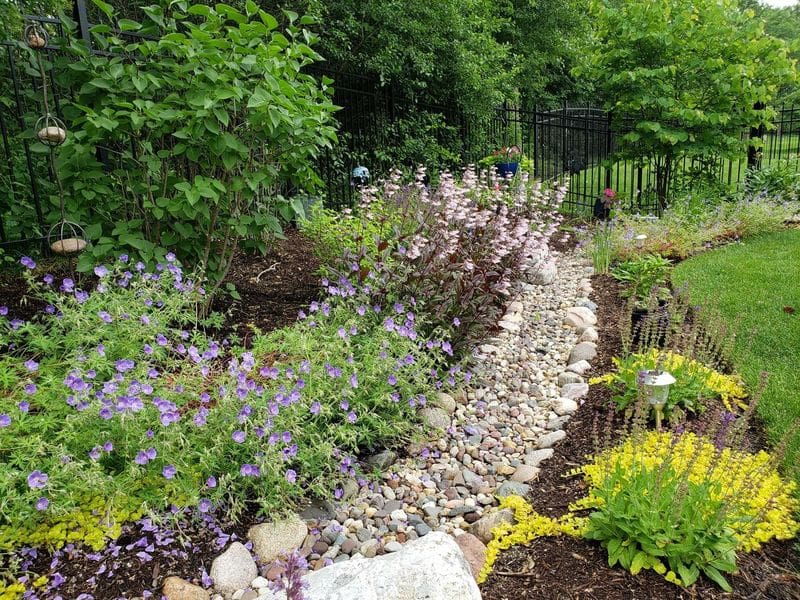
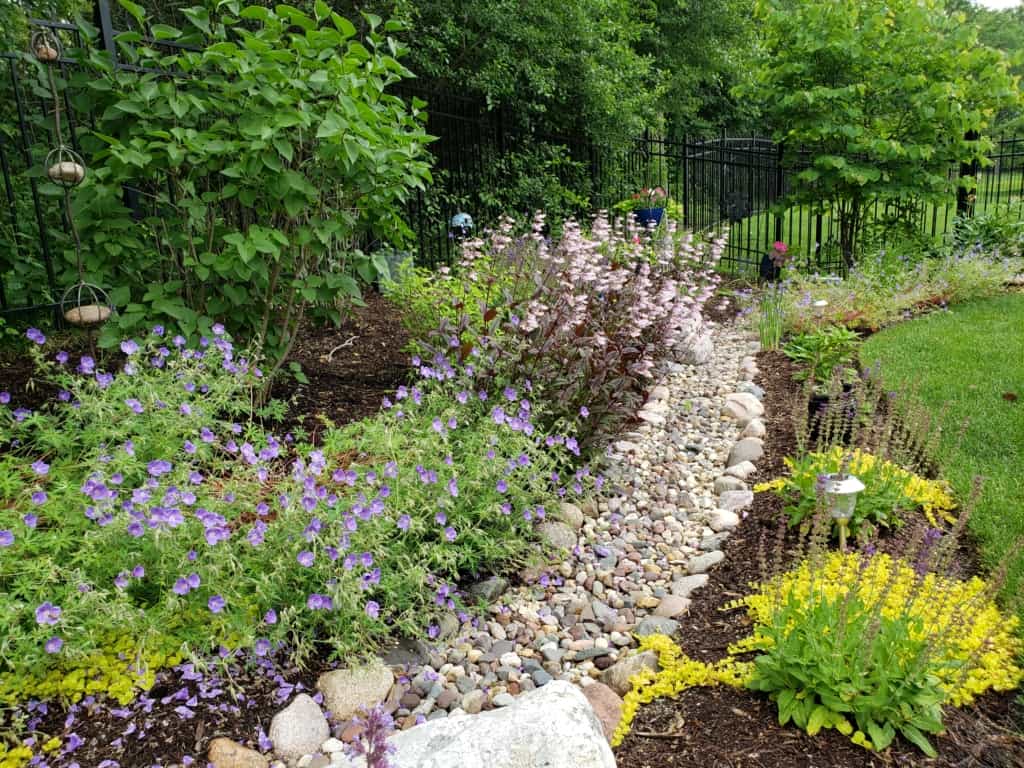
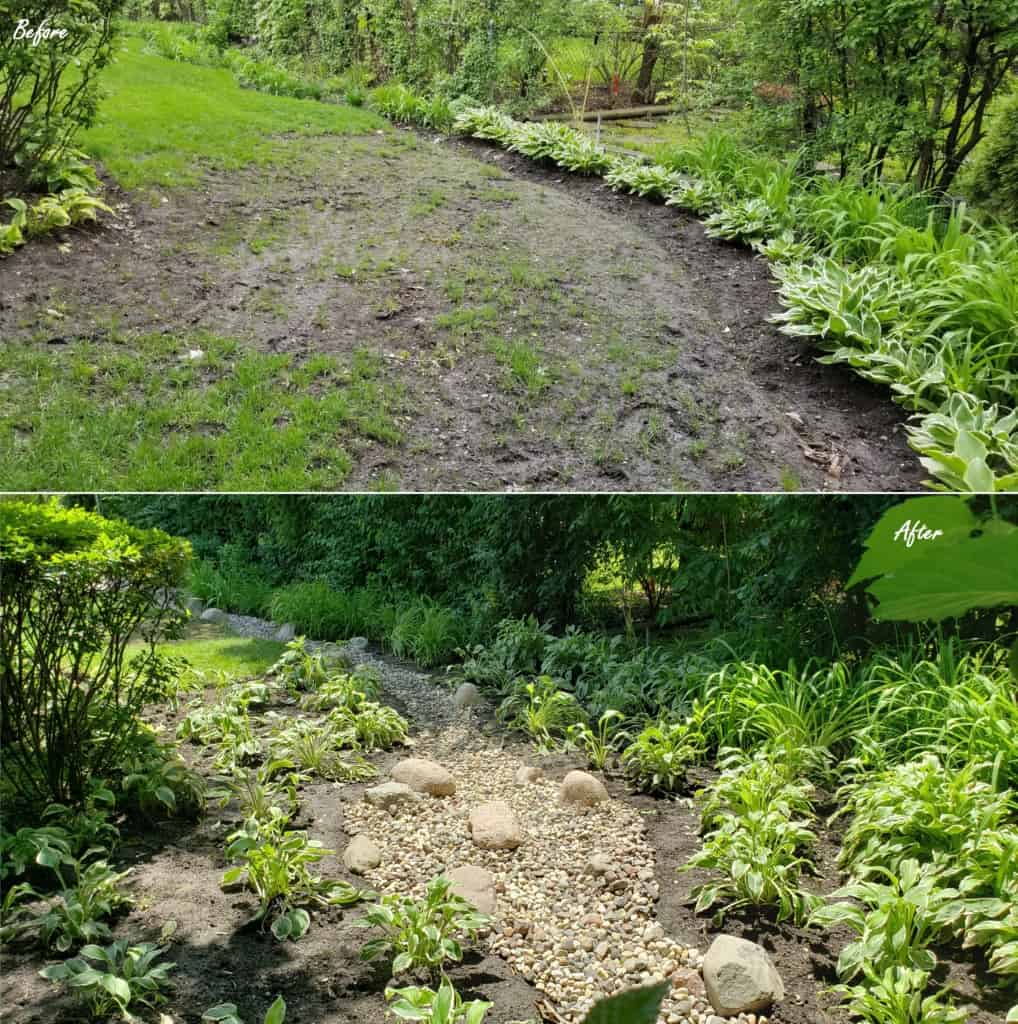
A client recently purchased a modest ranch on 1 acre. They wanted to remodel the home and formulate a plan on how to care for the existing heirloom gardens created by the former owner. This was a very overwhelming task to the homeowner, who had no idea what a treasure they had. Not knowing where to start we made a list of priorities, which was to be incorporated into an overall working plan. These priorities included: After eradication of countless Buckthorn and three Ash trees there was a need for privacy planting. The use Black Hills Spruce (Picea glauca densata) and Deerproof Arborvitae (Thuja plicata) helped to block off the view to the neighbors house. Chosen for their resilience to part sun environments and tolerant of variations in soil moisture as well as a fast growth rate. Serviceberry (Amelanchier grandiflora) were incorporated to provide both spring and fall color a much needed element. To compliment these plantings and add additional fall foliage and winter interest, Red Twig Dogwood (Cornus sericea) and graceful Maiden Grass (Miscanthus sinensis Gracillimus), both of which will thrive in moist soil conditions were added to the landscape. The longer-term plan is to fill in the foreground with transplanted perennials from the massive garden they inherited. An open French drain concept for drainage was presented in the preliminary stages of design. The client liked the idea of a dry stream bed which would redirect puddling water from an over active sump pump. This was accomplished by grading a swale from the sump outlet to the lowest spot on the property.. The natural drainage of the area was supposed to exit the property on the South and continue in a drainage easement through 7-8 properties until it hits a drainage exit. The problem with this plan, as brought up by a village civil engineer, was there was no longer a substantial pitch for water to exit the properties through the drainage easement, due to gradual buildup of debris and grade. To solve this problem, an ejector pump was suggested, which would bring water from a 24” concrete catch basin, to the West side of property to be discharged into another dry-stream bed. Once the water flow issues on the property were solved, and the minor surface undulations in grade were smoothed out, the French drain was dressed up to look a little more natural, adding various size boulders and adding contour to the stream bed. This concept was extended to the entire roadside drainage ditch to move water through the area more rapidly, simplify maintenance, and add curbside appeal to the property. With these issues solved the client can now enjoy the fruits of the previous owners labor with some of their own personal touches added. You’ve most certainly seen a hydrangea or two in about every garden you encounter. But do you know which one to use in your garden? There are a lot of hydrangeas out there. A lot! Hydrangeas most commonly grown in North American gardens, fall into six species. Which are then broken down into many varieties of each. But we’ll touch on the most common and add a few of our favorites! These beautiful ball shaped blooms come in about every shade of purple, pink and blue. The hard working Endless Summer is quite popular around here, as are most of the new introductions that have since followed. There are also lace-cap varieties in this group. The older varieties of H. macrophylla would only bloom on “old wood”, meaning if you had a harsh winter the flower buds would be killed. Luckily with breeding comes better varieties that bloom on old and new wood. Tardiva is an old favorite. The panicled hydrangea bloom late summer into fall. A great plant to extend the bloom season. There are many varieties that range in colors of flowers to overall size of plants (dwarfs). We like to use Hydrangea Bobo a sweet little dwarf with a nice clean white flower. Limelight is another showstopper with a chartreuse green flower head. Paniculatas require more sun than H. macrophylla, are usually larger, the flower heads more triangular/cone shaped, and they bloom on new wood. These native beauties have large, oak like leaves that turn beautiful shades of deep red in autumn and has a peeling bark that looks like cinnamon. Flowers are usually large cone shaped white blooms, that age to pink. Hydrangea quercifolia Jetstream is our oak-leaf of choice! These are the ever popular Annabelle hydrangea – the large, floppy mop-head hydrangea. In recent years newer varieties have been developed which include larger flower heads and even some with pink flowers – like the white Incrediball and the pink Invincibelle Spirit II. The Smooth Hydrangea also blooms on new wood, always. So these are great plants for colder climates! As the name says, this is a climbing hydrangea, a great plant to cover a wall. It grows in full sun and part shade. The flowers are a white lacy like bloom. It does require some maintenance as it will grow over just about anything! Blooms on old wood. These hydrangea come from Japan and look similar to the macrophyllas, but are hardier. We like Hydrangea Tuff Stuff. The Mountain Hydrangea bloom on old and new wood. When1 it comes to priorities in the lives of homeowners, few can argue that the family will be at the top of the list for most of us. Family can be a very large motivating factor when considering hiring a company to complete a series of backyard patio designs. As our families go through different stages in life, the outdoor needs of the family change. Take, for example, a new family purchasing a starter home. The home’s aesthetics may take on a high priority, focusing on front yard landscaping ideas, and curb appeal, giving the home an updated look. As a family grows, and the child or children are in a playful discovery stage, backyard designs should have certain elements to encourage time to be spent outside playing or learning about the world around them. In most cases, an area for a playset becomes an essential part of the space available in the backyard for families with toddlers and younger children between the ages of 2 and 8. There are other ways to develop places meant to encourage play and imagination other than a playset and they could include; development of a wiffleball area or space for games or other sports, utilizing large landscape rocks to climb on, creating other playful elements such as rope swings, hammocks in sandy areas meant for creative play and rest and even flower bed designs that would allow kids to grow their own flowers for cutting and displaying in their room or growing vegetables to enjoy as a family. As a family starts to mature, and the kids start to get out of the playset stage, the priorities of the outdoor space change. In this residential case, a family who has been in their house for over 20 years now, chose to shift their backyard focus to a social atmosphere which includes; a fire table, a new grilling and foodservice counter, a hot tub and a comfortable , shaded outdoor living room complete with weatherproof television and a fan to deter mosquitoes. The entire motivation behind this substantial landscape investment was to create a space outside where the family could watch their beloved Green Bay Packers every week in any weather. In designing this space, a priority list was compiled after the initial introduction meeting. After contracting with the clients for a landscape design phase, we developed a preliminary concept plan, integrating the elements that were important to the clients. Through the exploration of the area available for development in scaled landscape design, the client identified a target space they felt most comfortable. The preliminary concept was then modified to place a greater focus on spatial development in this area. We worked together to conceptualize a backdrop, which would provide privacy as well as present an opportunity to mount a television and set up a sound system. What we ended up doing was integrating a wall on one side of the planned pergola and using reclaimed barnwood, mounted to a treated timber frame, to give a practical backdrop and create a pleasing aesthetic. Besides the entertainment area, the priorities on this outdoor room included; an area for grilling and serving food, a space for a fire pit or fire table, shade due to a glaring southern exposure and utilization of large format stone or concrete pavers/landscaping bricks. Additional priorities included a privacy planting to cut views from the road out, planting of beds surrounding patio space for color and to soften the large area of hardscape. Integration of flagstone into the paving concept to bring elements of the front yard landscaping to the rear yard and a water element for sound and movement. After being about 70-80% into the installation process, the client brought a new concept to the table; “If we could introduce a hot tub into the space, then we could watch the football game outside even when it is cold.” There was really only one practical location for this idea to be executed, so we made plan revisions and submitted these changes in plans to the village for permitting. We determined that this hot tub should be set into the landscape if possible and not just dropped on top of a pad, looking like an afterthought. We built a 30” retaining wall consisting of segmental wall units around the concrete paver pad that was needed to set the hot tub on top of. This allowed the tub to sit lower in the ground, making access in and out of the tub much easier, as well as allow the tub to be set into the landscape, surrounded by plants and stepstones for easy, clean access with bare feet. Finishing touches on the landscape development included modification of the existing irrigation system to accommodate the new patio, installation of transplanted perennials along with new groundcover in surrounding planting beds, and lawn restoration from construction activity. Finally, low voltage lighting and a 16 speaker sound system rounded out the tech side of the project, and extended the usable hours well into the evening. Now that the backyard has been developed into a place that can handle 20+ people comfortably, in a number of different spaces all with a clear shot of the game on the TV, the Harris family sees a lot more of each other and their extended family on game days, which has brought them closer and reinforced the priority of family in a time of countless commitments and distractions. In your next landscape project, consider both where your family dynamic lies, and how that dynamic may change and develop in the coming years and make sure to plan accordingly for the different needs of a maturing family. A well thought out and developed outdoor room will add both aesthetic and functional value to your home and encourage all in the house to slow down once in awhile and just be able to enjoy each other’s company in a well planned, intimate and relaxing space. This saying is true, but it also reveals any drainage issues that may be present in the landscape. Tackle them now so that you can enjoy the rest of the season in your garden. With 40 years of experience, we can tell you that the first consideration when designing any substantial property enhancement is water management. From the first semester in a design program we were taught to mitigate water on a property. To be able to show it graphically; as to not endanger the house, not direct water irresponsibly onto adjacent properties and to ensure that standing water does not exist for an extended period after a rain event. From a business and sales standpoint, calls about drainage problems are welcomed in the industry because they present a high priority service necessity, rather than another landscape enhancement that may be a luxury. Water problems, if left unattended, could threaten a home to the point of doing tens of thousands of dollars of damage. For this reason, many homeowners will place absolving water problems as the highest item on their home improvement list. As a designer, solving drainage issues in a creative matter has always been a goal of ours. We strive to look at problems as opportunities to not only improve the situation, but to improve the aesthetics on a property as well. There are several ways to disperse the water from your property. As is often the case it is necessary to put pipes in the ground to solve grading and drainage problems. However, there are many cases where an opportunity for an alternate approach could be presented for at least a portion of the drainage enhancement. When introducing these alternate drainage concepts, in our experience, they are often described in many different terms, depending on who may be describing the size, scope, shape or design intention of the concept. These terms include; swale, dry stream-bed, rain garden, bioswale, open french drain or even “old riverbed”. They are all designed to accomplish 4 basic goals: There are a number of rules to follow when it comes to designing a drainage solution on a property. It is always best to get a copy of the client’s topographical site plan and if this is not available, at a minimum a plat of survey to determine lot lines and location of easements or public sidewalks. Some communities require permitting for drainage work, and in this case, local codes vary regarding the distance from a drain line outlet to a public sidewalk or lot line. Examples of this kind of code stipulation are; ensuring that the outlet is 10 feet away from a public walk and no less than 5’ away from a property line. Permits through the building and development office of your township may NOT be required, but it is always best to see what local codes dictate. Some communities even require silt fencing, engineer stamped grading and drainage plans, or permission to commence the work from a Home Owners Association. Once the issue of permits is determined, design can commence. Designs will address any requirements that the permit dictates. If a permit is NOT required, minimum design standards will include illustrations to indicate the following elements on the drainage plan; location of all downspouts, location of sump pump outlet, installation of any solid or perforated pipe, location of intended swales and the direction of water flow, intended detention areas and location of ejector pump if necessary. Additionally, a cross section of the connection from downspouts to any underground pipes could be helpful to communicate to the client or the installation crew. Included in this cross section would be the detail showing the essential element of successful drainage, which is an air gap that must exist in our freezing environment to prevent downspout back-up or sump pump back-up. When pipes holding water slowly freeze over time due to freeze/thaw cycles, the positive flow of water away from the home ceases to exist and the water coming from the downspout or sump pump needs a place to exit, even if it is at the foundation of the house. For this reason, it is also essential to have proper grading around the foundation to ensure that surface water is flowing away from the house. Multiple times in the 2019 season, the team at Van Zelst turned a wet, often unsightly and difficult to maintain area of the landscape into a new, naturally irrigated area of the property enhancing the overall aesthetic on the site. New opportunities for color through revolving perennial blooms, to give the landscape an element of form and movement utilizing ornamental grasses and flowering shrubs and providing winter interest through evergreen species. All of these clients have reacted positively to the change and were pleasantly surprised by the positive impact a surface drain can have on the property, when they thought they would be spending their money on just putting pipes into the ground, rather than creating a whole new garden opportunity. The most typical landscape rock used for creating dry stream-beds is what we commonly refer to as washed gravel, river rock or Grade #6 stone. Essentially, this is stone with 1/2”-2”, rounded shape with no fines in the mix. Occasionally,when we are solving a drainage problem with permeable paving, we use CA #7, or angular ¾” chip with no fines as a drainage medium. The reason for the angular stone is that it compacts more effectively and it performs as a perfect base for permeable pavers. On top of these types of functional drainage stone, we typically use a more desirable and colorful gravel which we refer to as red flint. Additionally, various sizes of rounded cobbles and boulders are used to closely imitate the type and size of rock seen in streams and rivers. Once the intended plant material fills in the areas surrounding the new dry stream-bed, these become easy to maintain areas of the property and successfully move water away from the house into a practical and legal outlet area, improving the landscapes function and value. Well it’s just around the corner and if you have a green thumb you are probably itching to get out there! Here in the Midwest the weather can change every 15 minutes! So, if you think those plants are ready to be planted, let’s make sure you select the most cold hardy to get you through to warmer weather! Pansy and Violas are pretty popular in spring and fall, that’s because they can withstand a frost or two. The great thing about them is they come in so many colors! They are such fun plants to brighten up a sleepy and tired landscape, either in planting beds or containers. Prepotted bulbs are another must in your containers! Tulips, hyacinths, daffodils and the list goes on! When planted they may not seem like much at first, but as soon as the days grow a little warmer your patience will be rewarded. Pops of color will abound. There are a number of plants we consider cold hardy and are typically used for early spring (you can find more ideas here) but there are a few summer annuals that might just surprise you. These annuals can take the cool weather as well as the heat, making them a great all season plant(s)! Petunias, don’t mind the cooler days and nights and keep going through the whole year. With so many new varieties it’s easy to not fall in love with them, from the spreading Wave petunias to the mini petunia-like Calibrachoa. Not to mention they come in almost all the colors of the rainbow! A great multi season plant. Snapdragons are another summer annual that can take the heat and take the cold! Dwarf Snapdragons can provide early bloom color while taller varieties will bring later color, a great way to “cover” the faded bulb blooms. Just make sure to keep feeding your snapdragons to get continued bloom throughout the season! Alyssum’s have come a long way. They used to be summer only annuals, but newer varieties are taking the cold as much as the heat! These sweetly fragrant plants go from frost to summer and to fall with no problem. A great annual to cascade over your planters. Perennials are another way to get color and texture into your planters. There are many spring blooming perennials that can add a twist to your typical bulb and pansy planters. Columbines and Hellebores are great early bloomers! While Heuchera is a great foliage plant that comes in a variety of colors from greens, purples, to yellows and an added bonus of wispy blooms late in the spring. And lastly make those containers multi-purpose gardens, for display and for food! Plant cool weather veggies like lettuce, rhubarb and parsley for a fun mix. This planter contains some of the early lettuce crops in the center. Just because the leaves have fallen and the gardens have been put to bed, doesn’t mean you can’t still enjoy the outdoors. It’s time to get festive. Winter greens are a great way to add life to planters. There are many different choices of greens to add to your planters. The can be as traditional or as wild as you like. Along with fresh cut greens there are options of branches, pine cones, berries and lovely faux materials. Have a certain color theme? Let it shine through with preserved tinted accent greens. Let your imagination run wild! [metaslider id=5484] Just like a regular annuals planting; plan for thrillers, spillers and fillers. Use branches for height, greens as the fillers and draping evergreens, like cedar incense, or ribbon and accents for spillers. Insect pests cause significant damage to gardens and landscapes. In our service area on Chicago’s North Shore and Southeastern Wisconsin, we see the evidence of this every day. Although not all insects are harmful, the damage potential from insect pests can be huge. In fact, insects cause more damage to your garden than any other type of pest. Once established, the cost to get rid of insect pests can be significant. The resulting damage can ruin the appearance of your home landscape. So, be proactive! Keep a close eye on your plants and trees to prevent an infestation – look for signs of damage and disease. Plants that are stressed due to drought are especially susceptible to damage. Also, their growth can be adversely affected. Insects can harm any part of a plant and at any stage of its development. In serious cases, pests may even kill plants. Sucking insects may transmit disease from infected plants to healthy plants. Even trees can be subject to harm and complete loss, due to insect pests. For example, the emerald ash borer has done significant damage in our area. The beetle has contributed to tree loss by eating the tissue under the tree bark. Be vigilant in checking plants and taking action before things get out of control. Early detection and treatment can be the difference between saving and losing a prize specimen. Keep in mind that effective treatments, such as chemical insect sprays, may also harm or kill beneficial insects. To avoid this, it’s a good idea take advantage of expert resources: The number of pest species is large! Become familiar with our top 3 insect pests, so you can identify them and protect your plants from damage. Insect pests cause significant damage to gardens and landscapes in our area. Be proactive – learn about insect pests, monitor your garden for unwanted visitors, and take action to prevent infestation and damage to your special landscape. Call the experts at Van Zelst for information and assistance with insect pests: 847-243-6587. We spend spring and summer constantly taking care of our lawn. We put down fertilizers, disease & insect control applications and lots of mowing occurs! Seeding is an important part of the care of your lawn in the fall. Overseeding is the practice of applying new grass seed onto established turf grass. You may think this is only to be done for damaged areas or weak areas, but this is not so. As the grass plants age, they will lose some of their vigor. Overseeding allows seedling grass to fill in those damaged, thin areas while at the same time providing new plants within the older aging plants. A dense thick lawn holds up much better to the environment and foot traffic much better than stressed and aged lawns. There are benefits to a lush densely packed lawn besides it looking good. A fuller lawn will prevent weeds and weed grasses from taking over your lawn. Another huge benefit to a dense lawn it the incredible benefit of erosion control. A dense lawn will keep water and soil where it should be. There are many reasons why late summer and fall are superior to spring for planting grass. If you’re interested in learning more about overseeding or our professional maintenance team take care of your lawn, give us a call, 847-623-3580. More and more families are getting their hands in the dirt and producing their own vegetable and herbs. It’s a great way to get all involved from young to old. Traditional vegetable gardens are in raised beds or directly in the prepared soil beds. You may even find a vegetable garden on someone’s balcony (in pots that is!). The traditional vegetable garden can be as fancy as this: Or as simple as this: Don’t have room for the traditional Vegetable Garden? The trend now is to plant your fruits, vegetables, and herbs right next to your shrubs and perennials. If you are already planting annuals, it would be easy to substitute some of those for some veggies or herbs. They can but put directly into the garden or you could incorporate planters. Vegetables don’t have to be ugly and you don’t have to eat them either. Check out these spectacular mixed gardens: You can find these and other great varieties at Restoration Seeds!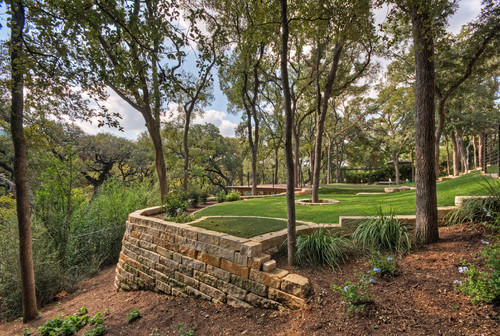 Posted in Garden Design

Inheriting a previous owners garden
The planning phase.
Implementing the plan.
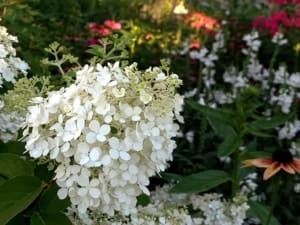
What Hydrangea Where?
1. Big-leaf hydrangea (H. macrophylla)

2. Panicle hydrangeas (H. paniculata)
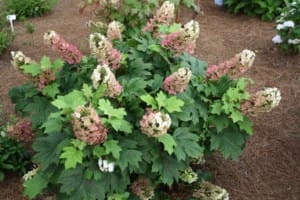
3. Oak-leaf hydrangeas (H. quercifolia)
4. Smooth hydrangeas (H. arborescens)

5. Climbing hydrangeas (H. petiolaris/anomala)
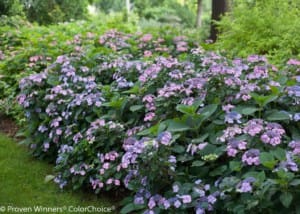
6. Mountain hydrangeas (H. serrata)
Hydrangea care:

Updated Family Environment For All Seasons
Family Matters

Design Process

Amendments and Accessories

Valued Results
How to Fix Backyard Drainage Problems The Right Way
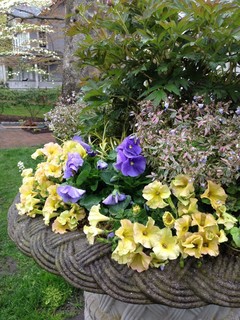
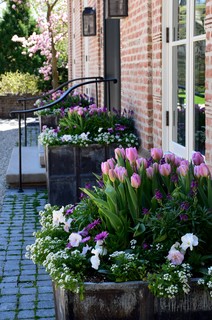
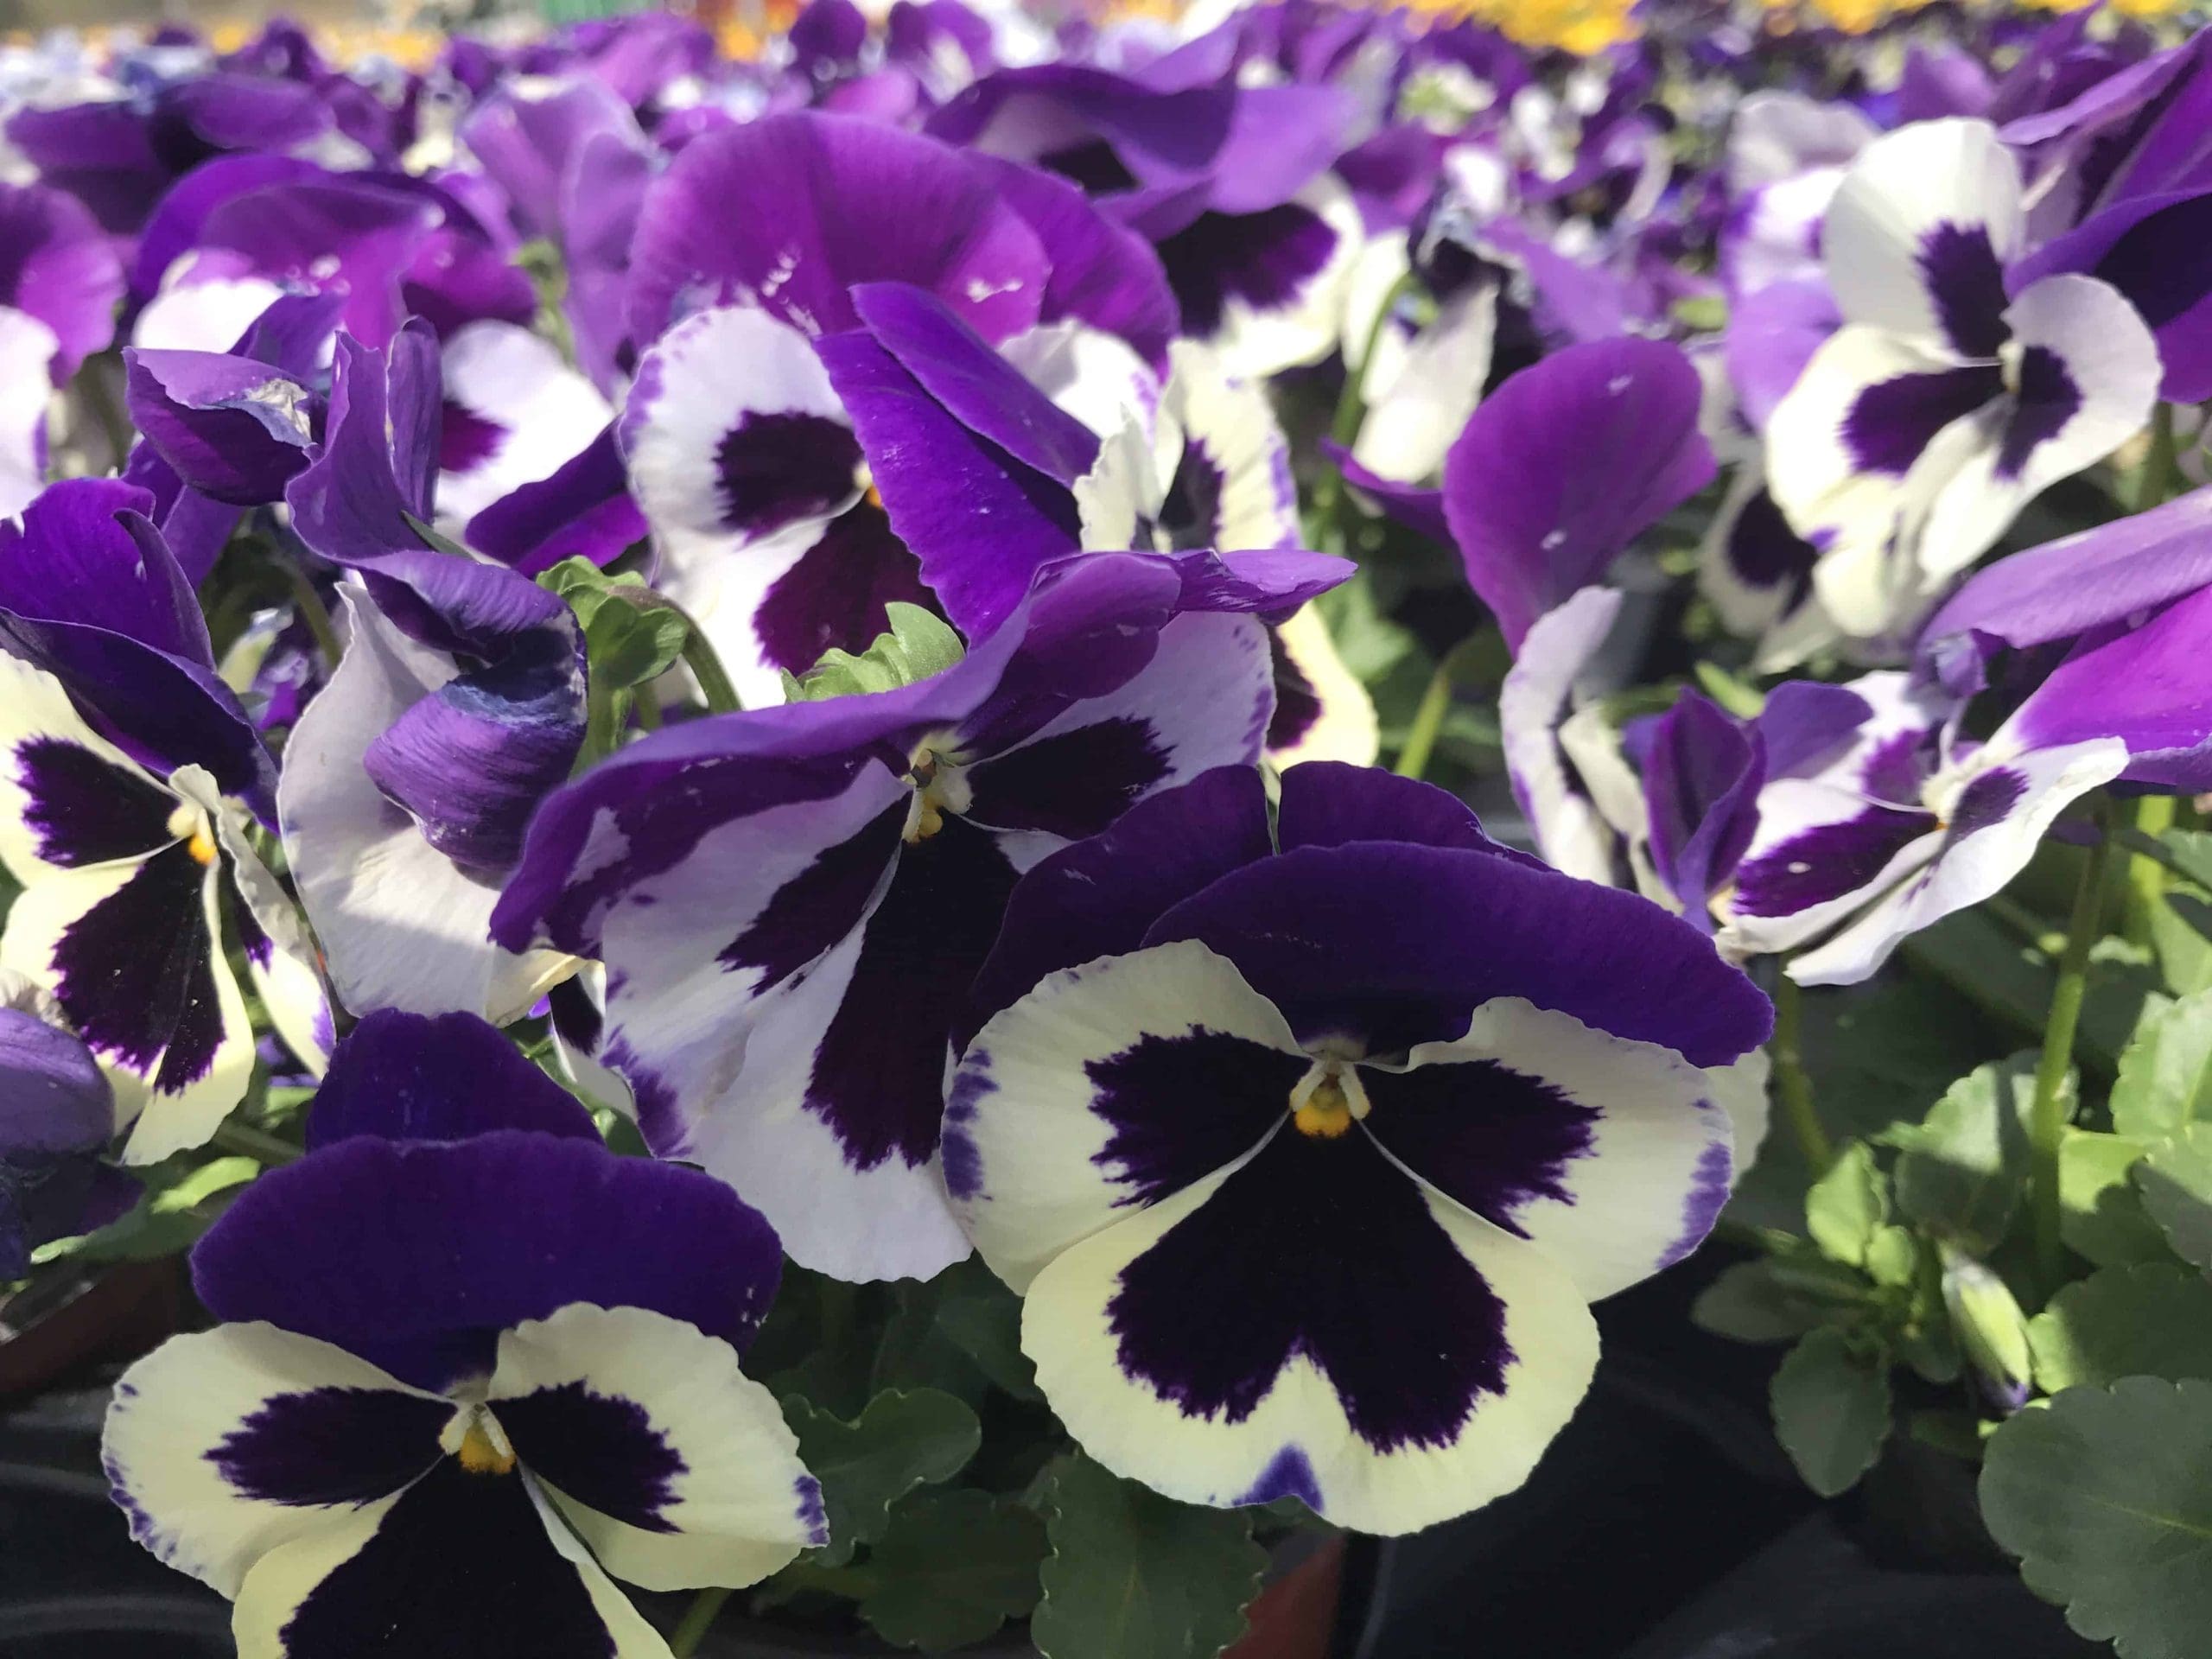
April showers bring May flowers
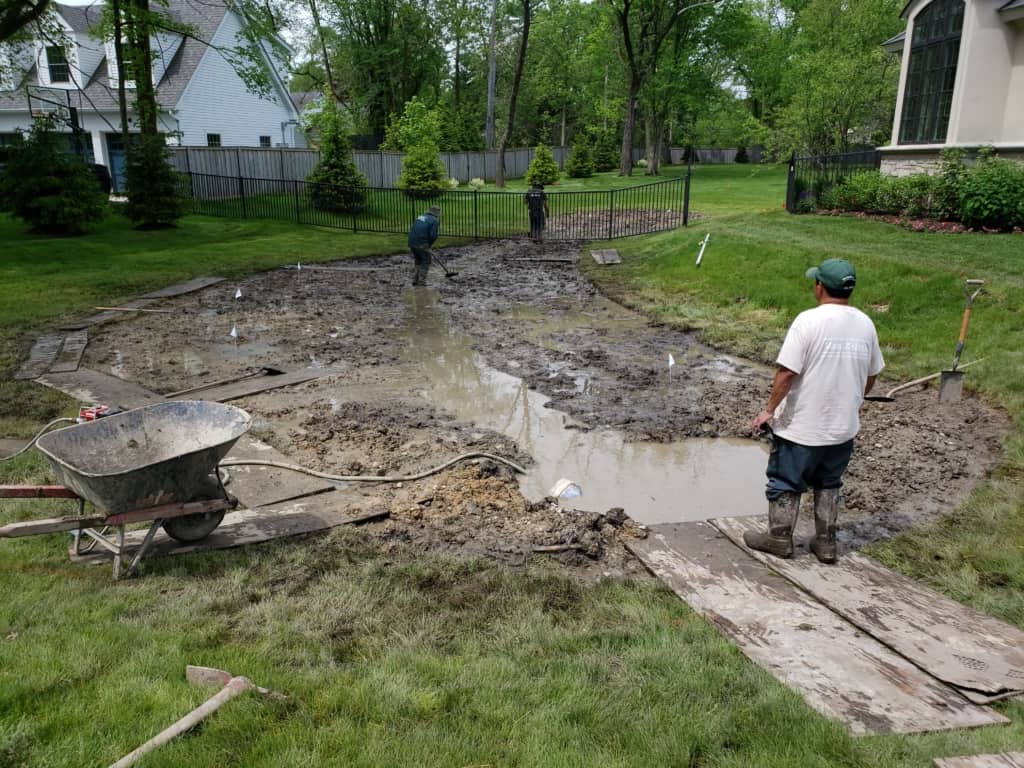
Design Foundations
Essential Elements of Successful Drainage
Lemons to Lemonade
Early Spring Planting Ideas
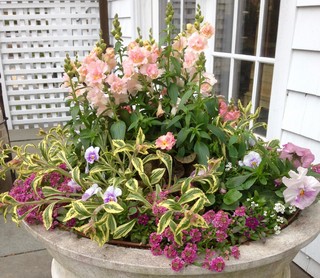
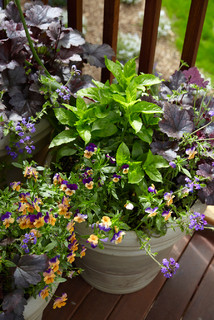
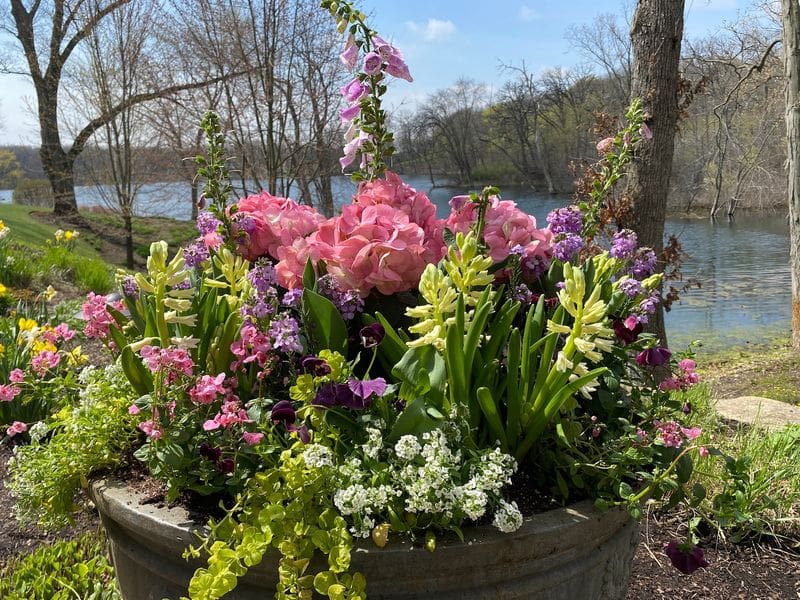
Annuals you might not have considered:
Perennials in containers.
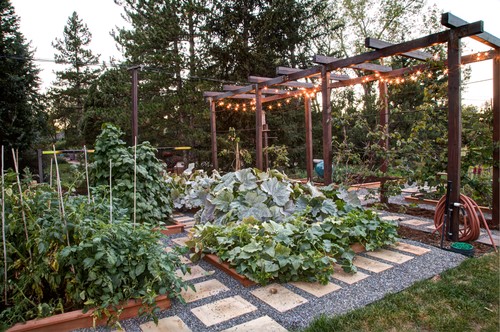
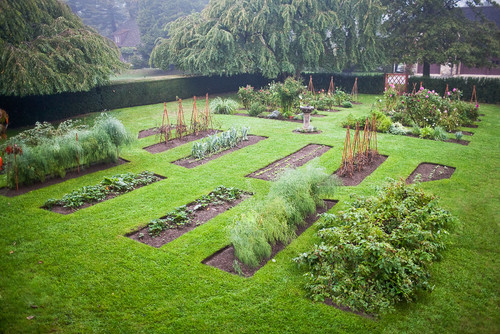
Vegetables and Herbs.
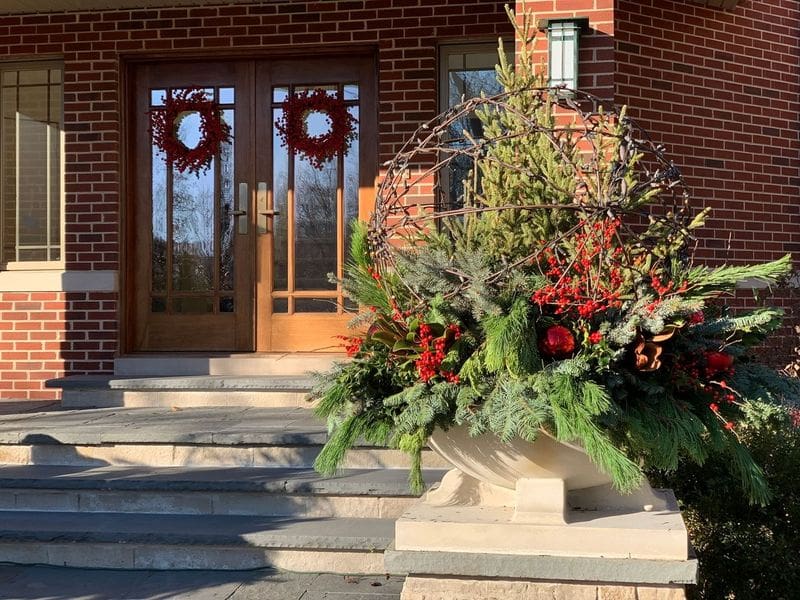
Spruce up your pots and landscape with winter greens!
Here are few tried and true winter greens that should fill out your planters:
Protect Your Landscape from Insect Pests
Get to Know these 3 Insect Pests
Two-spotted spider mite
Latin Name:
Tetranychus urticae
Description:
Small, tiny, wingless creature that is difficult to see without a hand lens or magnifying glass
Where they live:
Undersides of leaves
Plants affected:
Annuals, perennials, trees, and shrubs
Harm to the plant:
Sucks the fluid from the leaves which creates small dots or specks – also creates a fine network of webs that cover stems and leaves
Discouraging damage:
Keep plants well-watered – Chemical control only as last result
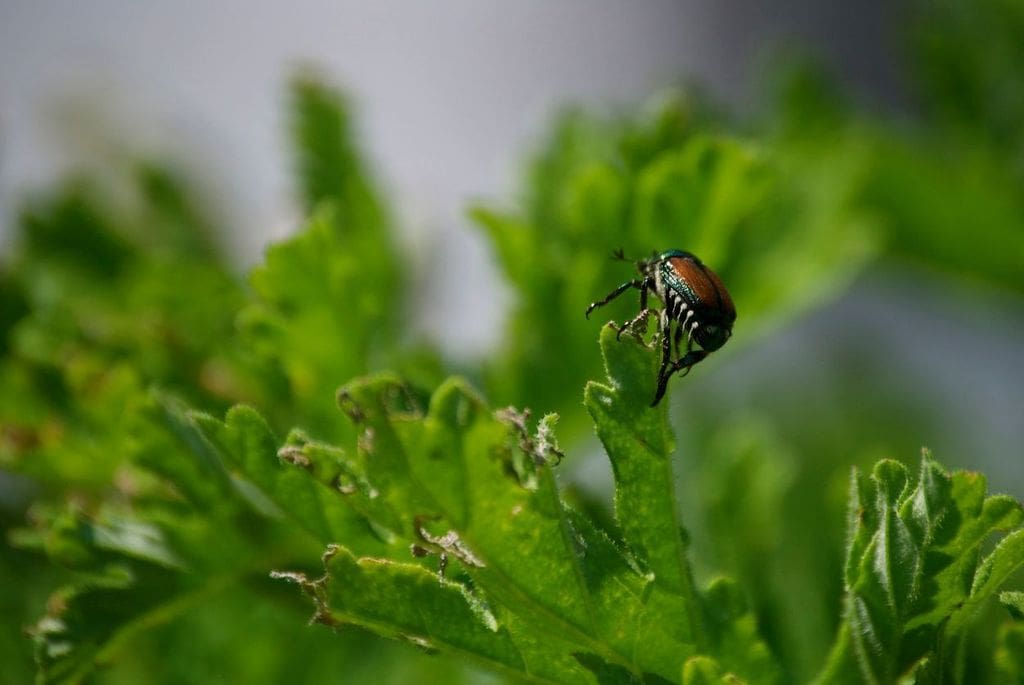
Japanese Beetles
Latin Name:
Popillia japonica
Description:
Metallic green insects that emerge in July and feed for 4-6 weeks
Where they live:
On plants, grubs live in grass
Plants affected:
Over 300 types of plants
Harm to the plant:
Chew on plants leaves and flower tissue, can create extensive damage and leaves will fall from the plants, grubs feed on the roots of grass causing brown patches
Discouraging damage:
Hand pick the beetles or knock them into a bucket of soapy water – best to do this in the early morning

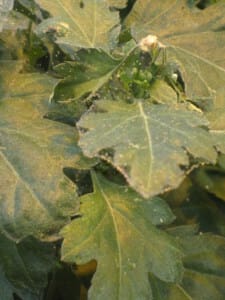
Aphids
Latin Name:
Aphidoidea
Description:
Small, soft-bodied insect – reproduces many times a year – easy to spot in clusters, usually wingless
Where they live:
On plants
Plants affected:
New succulent shoots, buds and leaves, perennials, annuals, shrubs, trees, vegetables
Harm to the plant:
Leaves and stems can become yellow, distorted or curled – produce honeydew secretion which can cause growth of sooty mold (a harmless black fungus)
Discouraging damage:
Spray plant with water to knock them off – insecticidal soap can be used with caution

Helpful Resources about Insect Pests
Bugs and Garden Thugs
Insect Pests
Insect Control
Garden Pests & Problems
Insect Pests: Is Something Bugging Your Garden?
Help with PestsIdentify Insect Pests and Protect Your Landscape
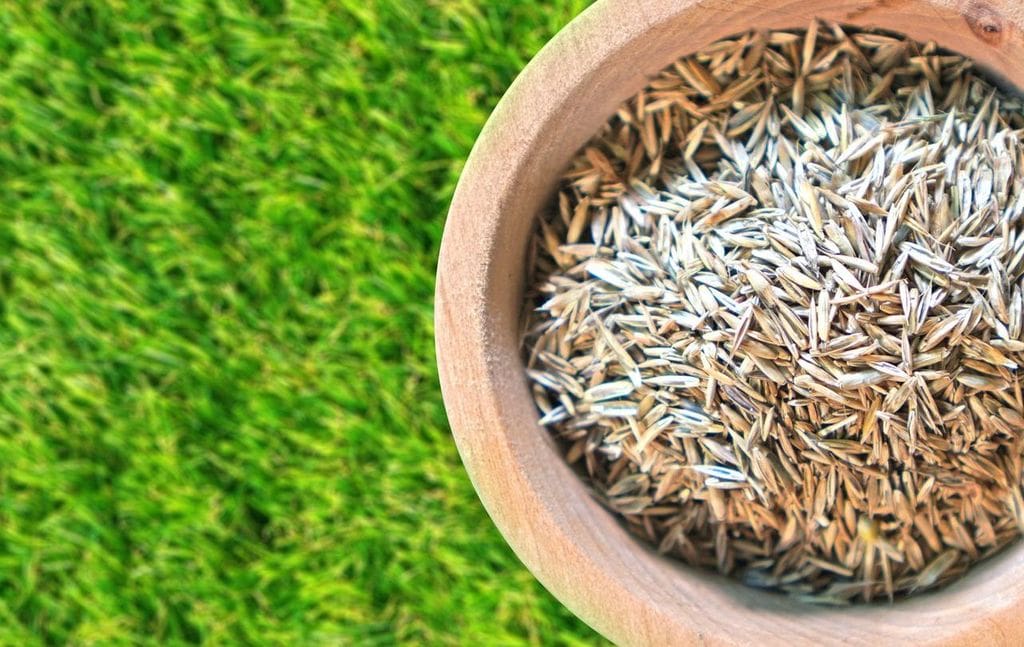
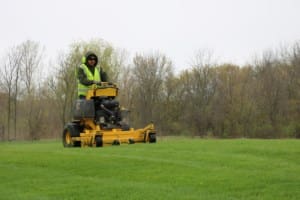
Benefits of overseeding your lawn
The warmer soil temperature is great for seed germination and your germinating seeds will
also have less competition from weeds like crabgrass. In addition, once your grass begins to grow, the cool air of fall stimulates growth for these cool season grass varieties.Preparing your lawn for overseeding:


Gardening with edibles

Listed below are some varieties that are just as beautiful as they are functional.