Landscaping Drainage North Shore

How To Fix Backyard Drainage Problems The Right Way– Revisited Fall Edition

Back on April 1, 2020, we published our spring-focused article on water problems and solutions to help homeowners prepare for April showers. That guide covered how rain exposes weak spots—soggy lawns, pooling along foundations, and overwhelmed downspouts. Now we’re in the fall stretch, and the challenges shift. Leaves, heavier bursts of rain, and the first freeze–thaw cycles change how water moves across your property. For homeowners on the North Shore, especially in Highland Park and Northbrook, fall is the ideal time to re-evaluate landscaping drainage north shore needs and put lasting fixes in place before winter sets in.

Table of Contents

  1. Why Fall Drainage Is Different (and Urgent)
  2. Popular Solutions That Actually Work (and Look Good)
  3. Designing Drainage the Right Way (Not the Quick Way)
  4. French Drains: Frequently Chosen—Just Not the Only Choice
  5. Materials That Maximize Performance and Longevity
  6. When to Call a Drainage Specialist (and Why It Pays Off)
  7. Local Nuances to Consider
  8. What a Typical Project Journey Looks Like
  9. Bottom Line & Next Steps

Why Fall Drainage Is Different (and Urgent)

Fall isn’t just “spring, part two.” It brings a unique mix of conditions that can strain a landscape:

  • Leaves and debris clog gutters, surface swales, and catch basins—forcing water to backtrack toward structures.
  • Short, intense storms dump more water faster, overwhelming shallow routes where water used to meander away.
  • Freeze–thaw lifts pavers and damages hardscape if water sits beneath or around them.
  • Late-season saturation leaves soils with little capacity to absorb more water, so even moderate rain can pool.

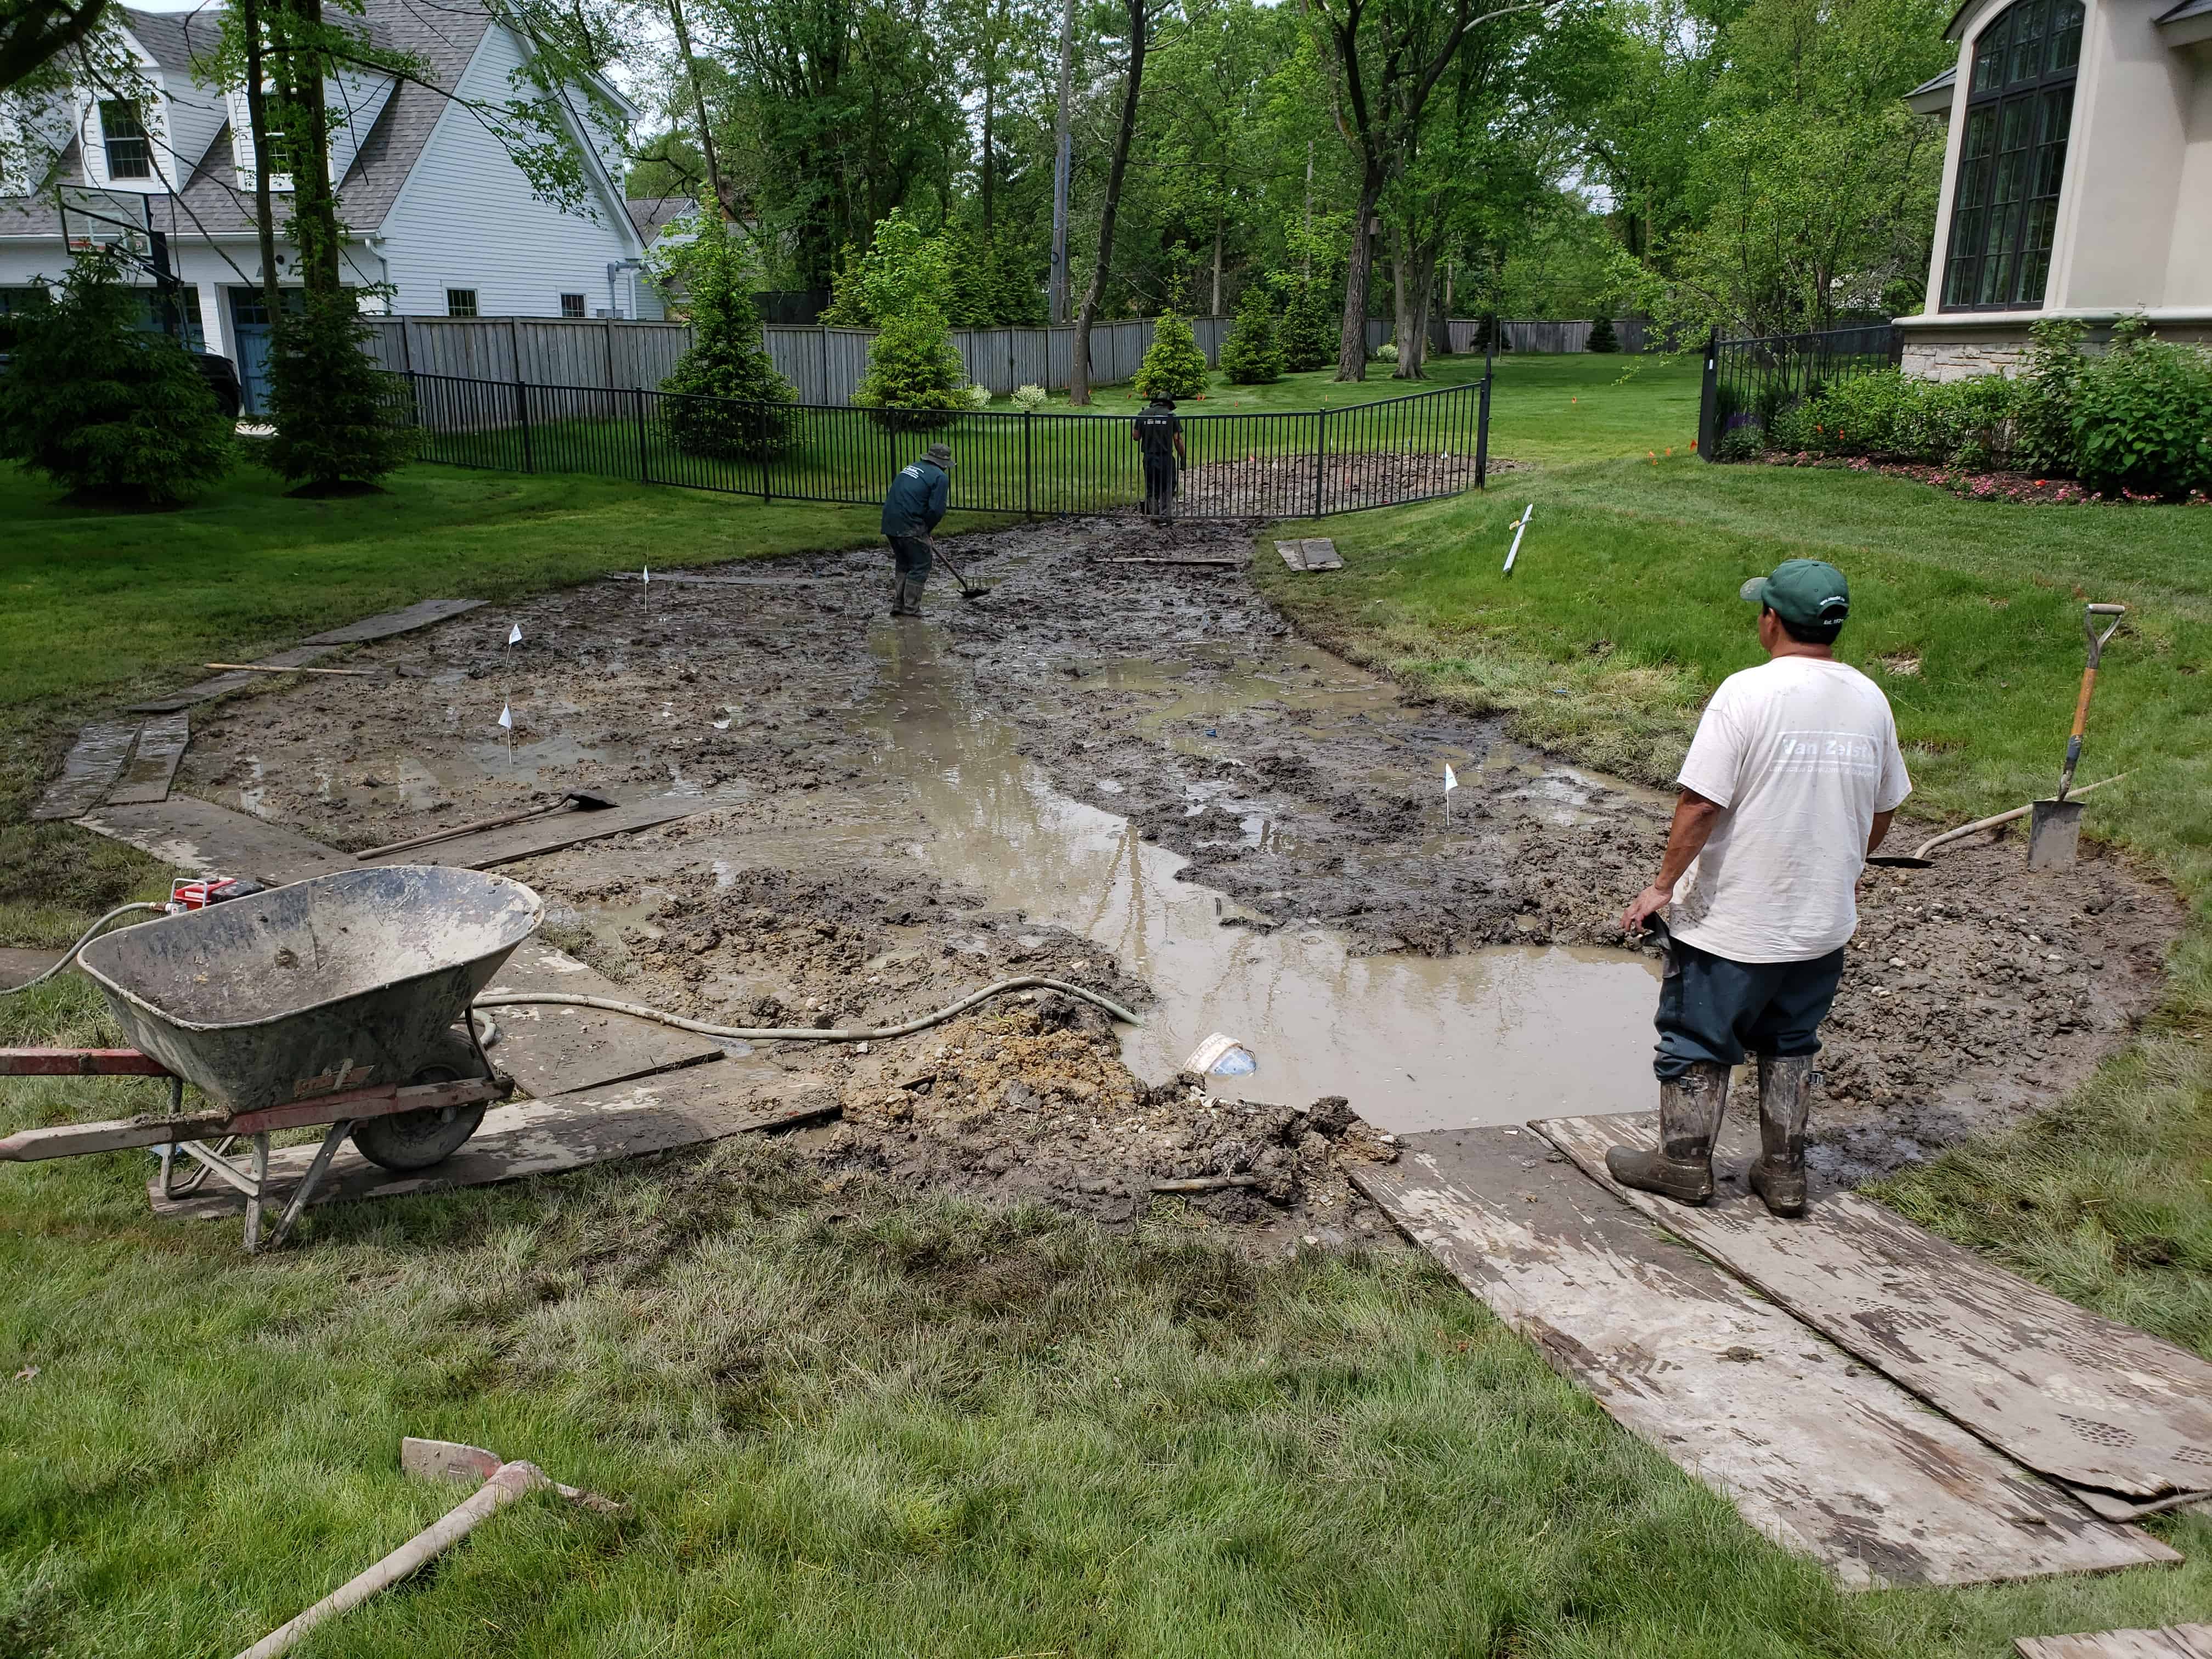
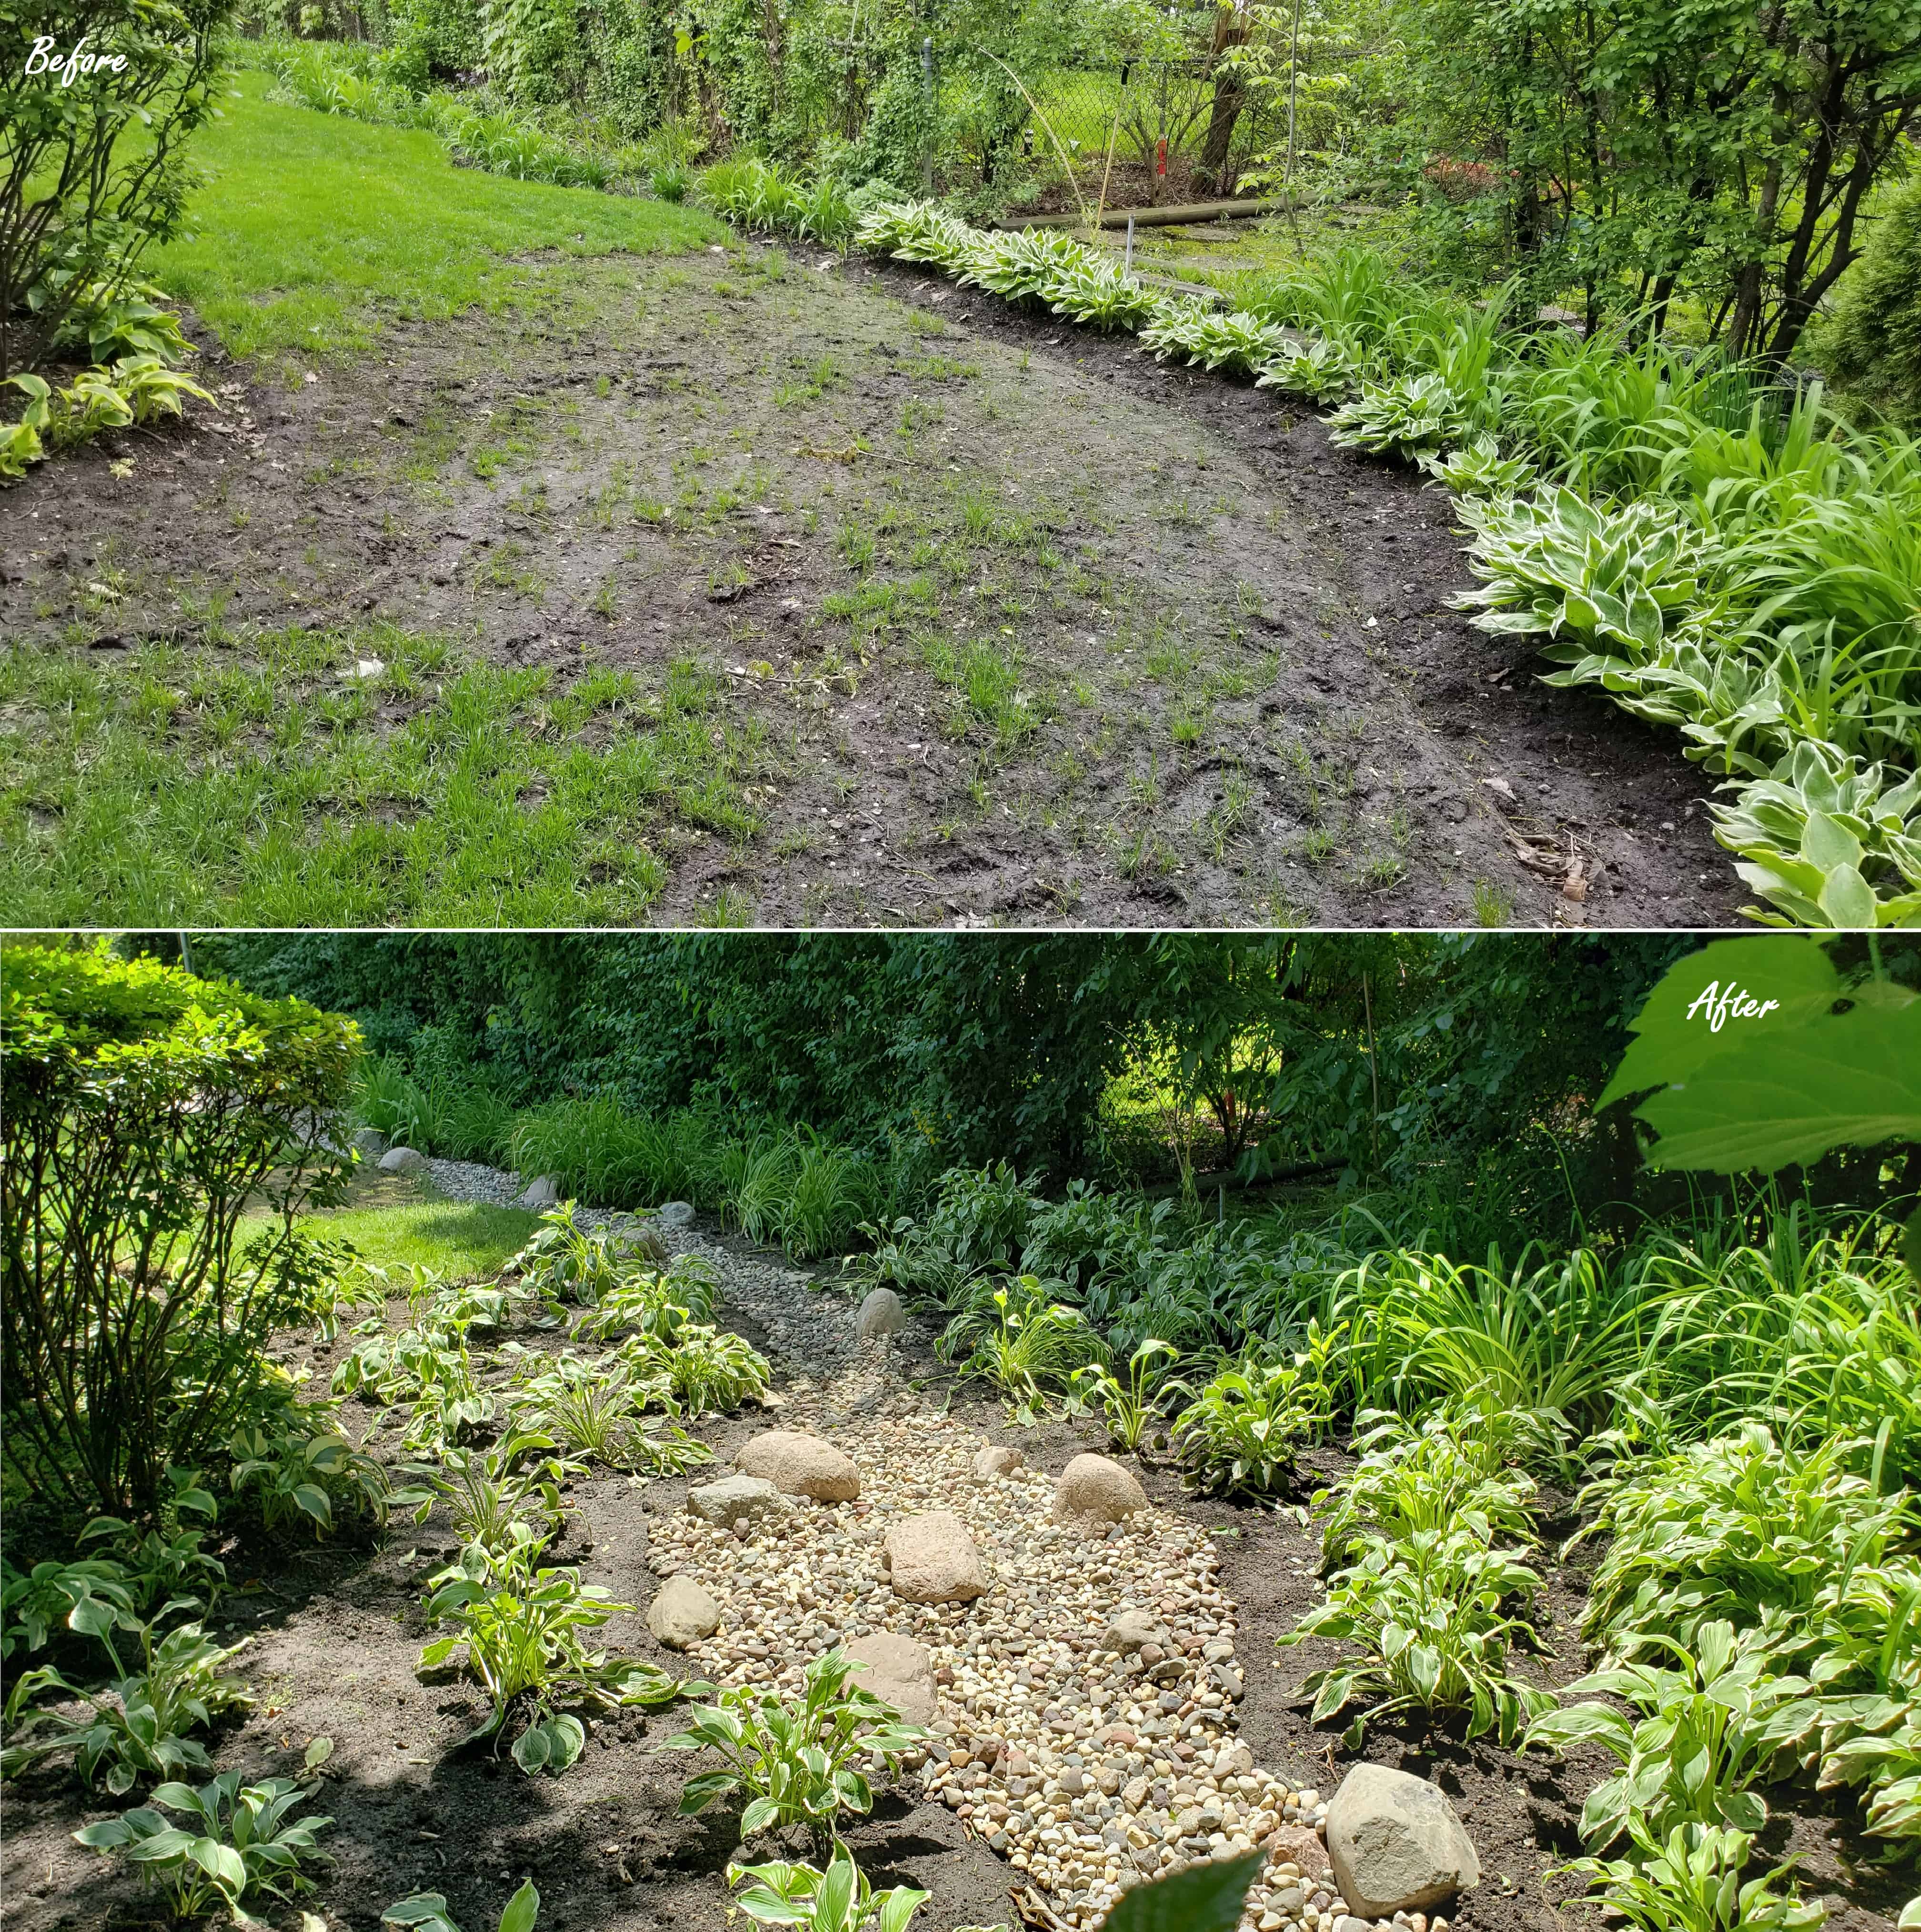
Left alone, these conditions cause muddy lawns, icy patches, and basement seepage. Addressing them now is about prevention, not panic—fixing what you see today and what winter will magnify tomorrow.

Landscaping Drainage North Shore Solutions


Popular Solutions That Actually Work (and Look Good)

There’s no single “best” drainage fix. The right plan considers your architecture, planting beds, slope, and soil. Here are the options we reach for most, often in combination:

  • Regrading: Subtle changes to pitch keep water moving away from foundations, patios, and walkways.
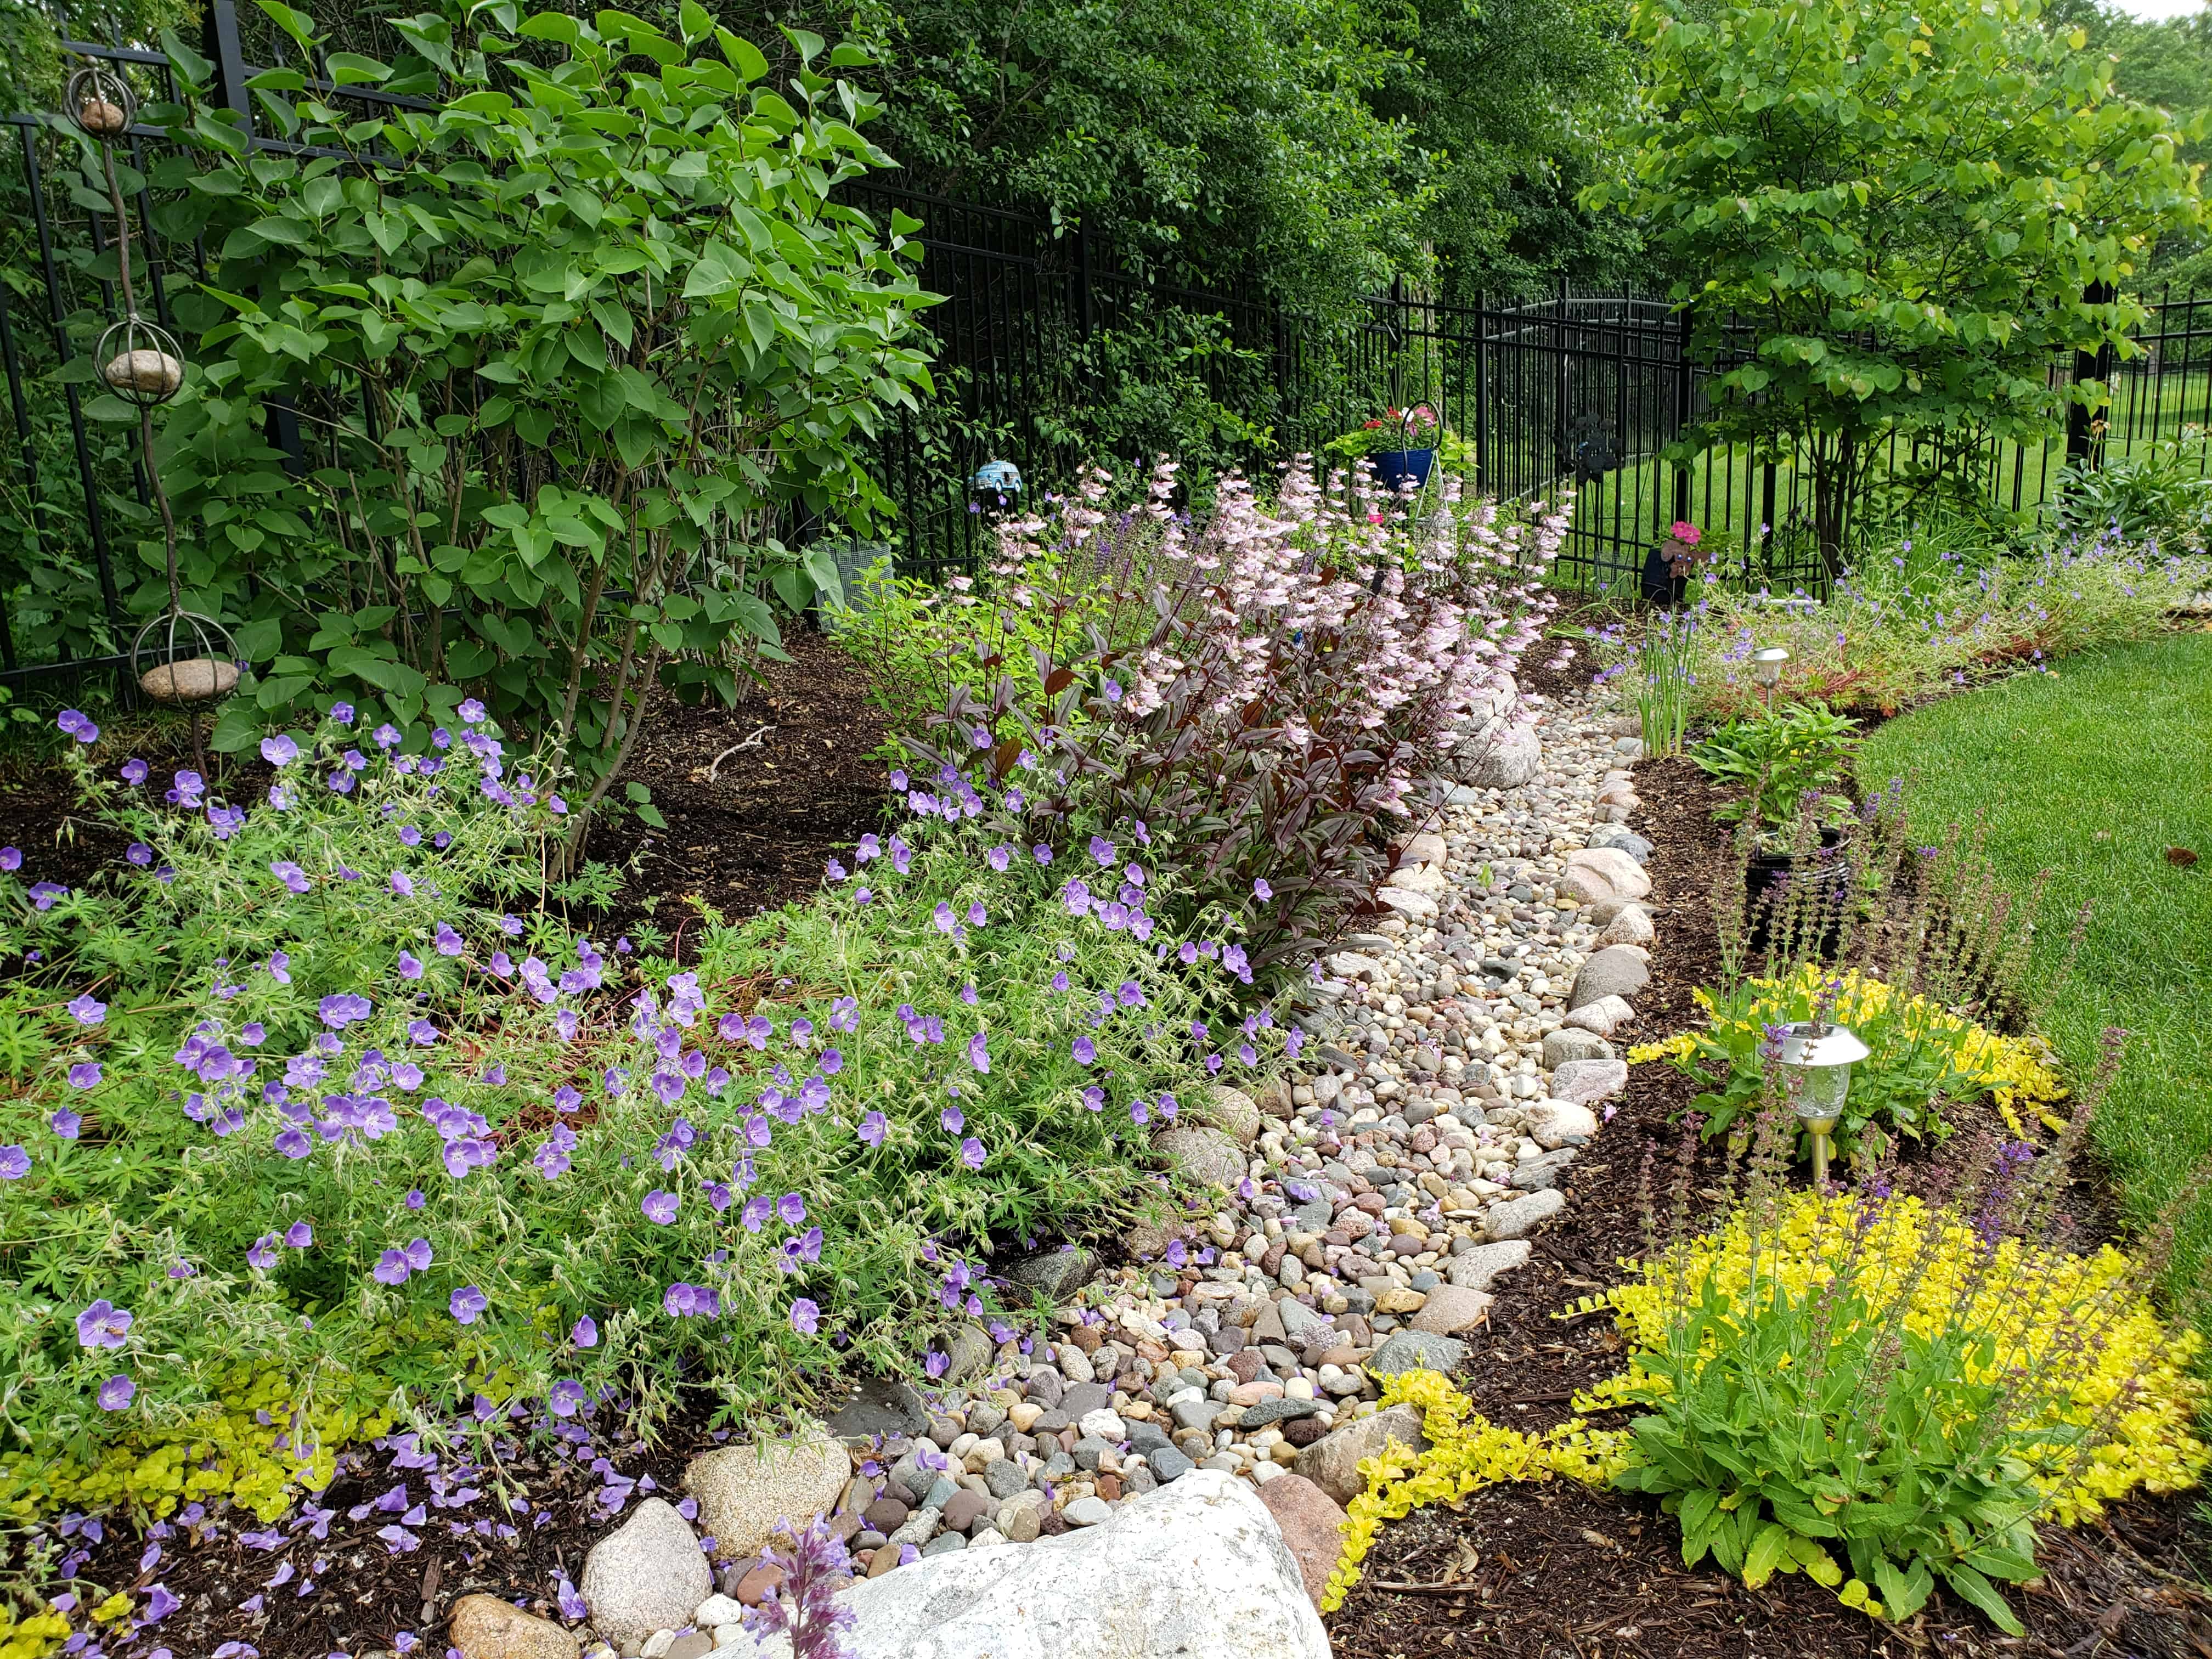
  • Swales and bioswales: Shallow, landscaped channels that guide water safely across the yard. Properly built, they look like natural features, not ditches.
  • Rain gardens: Planted depressions that temporarily hold and slowly infiltrate stormwater. They reduce runoff while adding four-season interest.
  • Permeable paving: Hardscape that lets water pass through the surface to a prepared base layer—perfect for patios, walkways, and even driveways.
  • Subsurface drainage systems: Piping and stone-filled trenches move water underground from wet zones to safe discharge points. French drains fall into this category and are popular because they work quietly under the surface and can be styled above with a dry creek-bed look.

We’ll often combine two or three of these so surface water has a clear route and any excess is safely captured below grade.

Designing Drainage the Right Way (Not the Quick Way)

A lasting fix starts on paper (or screen), not in a trench. Our design process typically includes:

  1. Site analysis: We trace the water’s path—how it enters, where it stalls, and how it should leave. We consider roof area, downspout locations, sump discharge, soil texture, and shade patterns that keep soils wetter.
  2. Local rules and practical setbacks: North Shore communities may require specific discharge distances from sidewalks and property lines, and HOAs can add further guidance on appearance. Getting this right avoids rework later.
  3. Integration with the landscape: Drainage shouldn’t look like a repair. We design swales as natural-looking streambeds, tuck in moisture-tolerant plantings, and coordinate with hardscape so paths and patios shed water properly.
  4. Future-proofing: We design for both routine rains and the larger “burst” events that cause most damage—plus freeze–thaw. Thoughtful grading and subsurface relief prevent heaving and cracking when temperatures swing.

We also plan for maintenance: leaf management, seasonal checks of inlets/outlets, and simple ways to keep systems clear without tearing up the garden each year.

French Drains: Frequently Chosen—Just Not the Only Choice


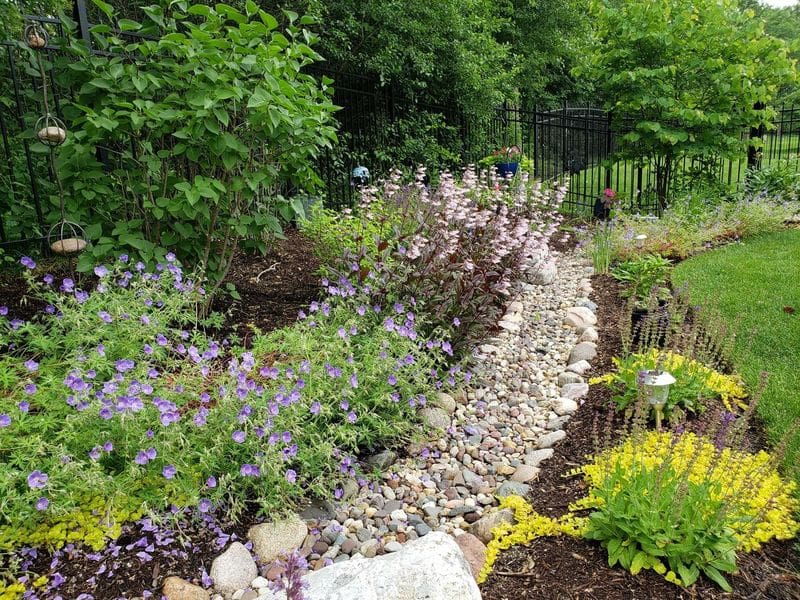
Because they operate underground, French drains avoid many leaf-related clogs that can plague open swales. They’re especially effective along foundations, in lawn areas that stay wet after storms, and in narrow side yards where surface channels aren’t practical. Aesthetically, we often finish them as dry creek beds using cobbles and decorative gravel so they read as design, not “drainage.”

That said, French drains are typically part of a plan, not the entire plan. We’ll still address grading, add permeable surfaces where appropriate, and ensure downspouts and sump lines move water to safe discharge points with an air gap to prevent freeze-related backups. If you want to read more about complementary, low-impact approaches like permeable pavements, rain gardens, and swales, the EPA has a helpful overview of methods here: EPA stormwater management practices.

Landscaping Drainage North Shore


Materials That Maximize Performance and Longevity

Successful systems come down to details. We specify:

  • Washed gravel or river rock (½–2″) in subsurface trenches to keep void space open for flow.
  • Angular stone (e.g., CA #7) where compaction and structural support are needed—especially under permeable paving.
  • Decorative gravel and cobbles to finish surface features so they look intentional and blend with the style of your garden.
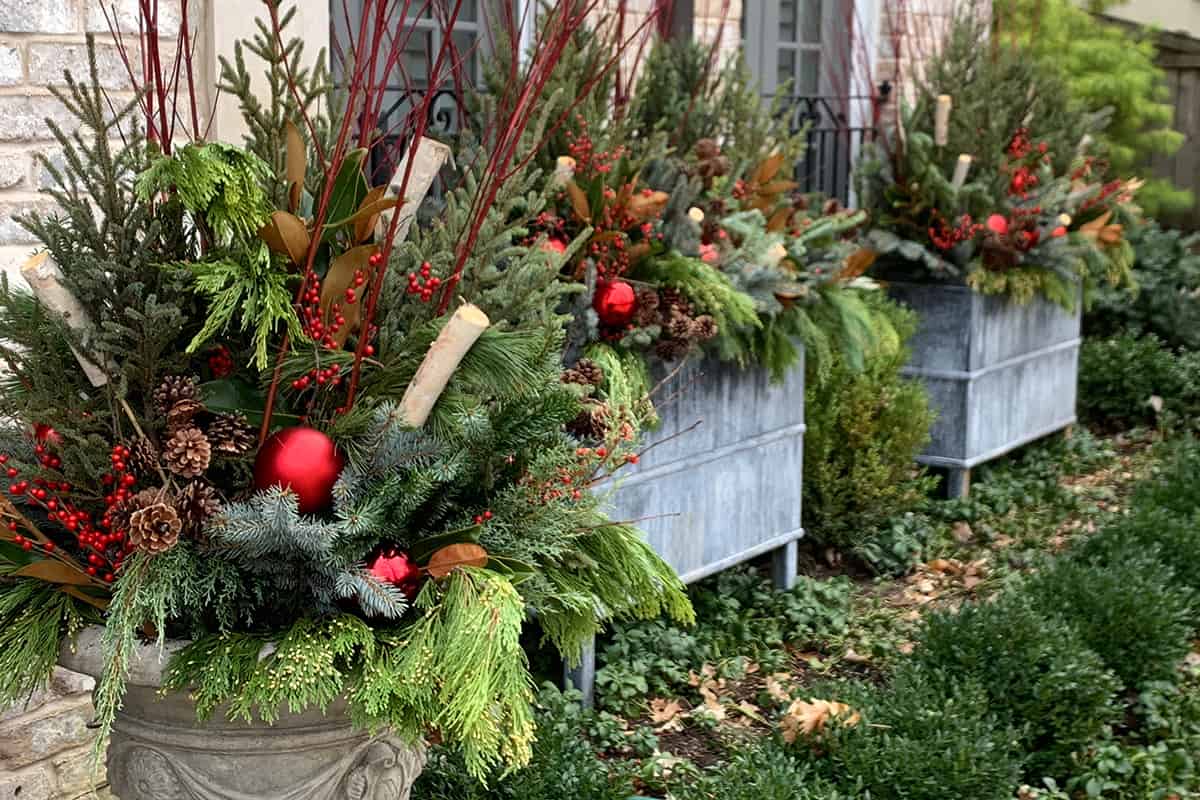
  • Moisture-friendly plantings—ornamental grasses, hardy perennials, and select evergreens—to stabilize edges, reduce erosion, and deliver year-round interest around swales or creek beds.

This attention to structure and finish is what turns a fix into a feature.

When to Call a Drainage Specialist (and Why It Pays Off)

DIY solutions can help with minor issues, but persistent wet zones and foundation-adjacent problems demand precision. A specialist will:

  • Confirm slopes with laser levels and ensure positive pitch away from structures.
  • Integrate downspouts, sump discharge, and overflow routes so the system works as one.
  • Balance surface design with subsurface relief to prevent freeze–thaw damage.
  • Respect community rules and HOA expectations—on the North Shore, that can matter as much as performance.

If you’ve battled the same wet patch for years—or you want to solve it once and do it beautifully—bringing in an expert saves time, protects your investment, and avoids “rip-and-redo.” For homeowners comparing options for landscaping drainage north shore, professional planning is almost always the difference between temporary relief and long-term peace of mind.

Local Nuances to Consider

  • Mature trees and established gardens often require drainage routes that weave around roots and planting beds. Near the lakefront, soils may drain more slowly, so we plan for staged movement of water and choose plantings that tolerate periodic wet feet.
  • Newer subdivisions and tighter lot lines can mean stricter rules on discharge locations and appearance. Subsurface systems (with thoughtful surface finishes) are a common path to both compliance and curb appeal.

In both types of communities, we match materials and plant palettes to neighborhood character so solutions look like they were always meant to be there.

What a Typical Project Journey Looks Like

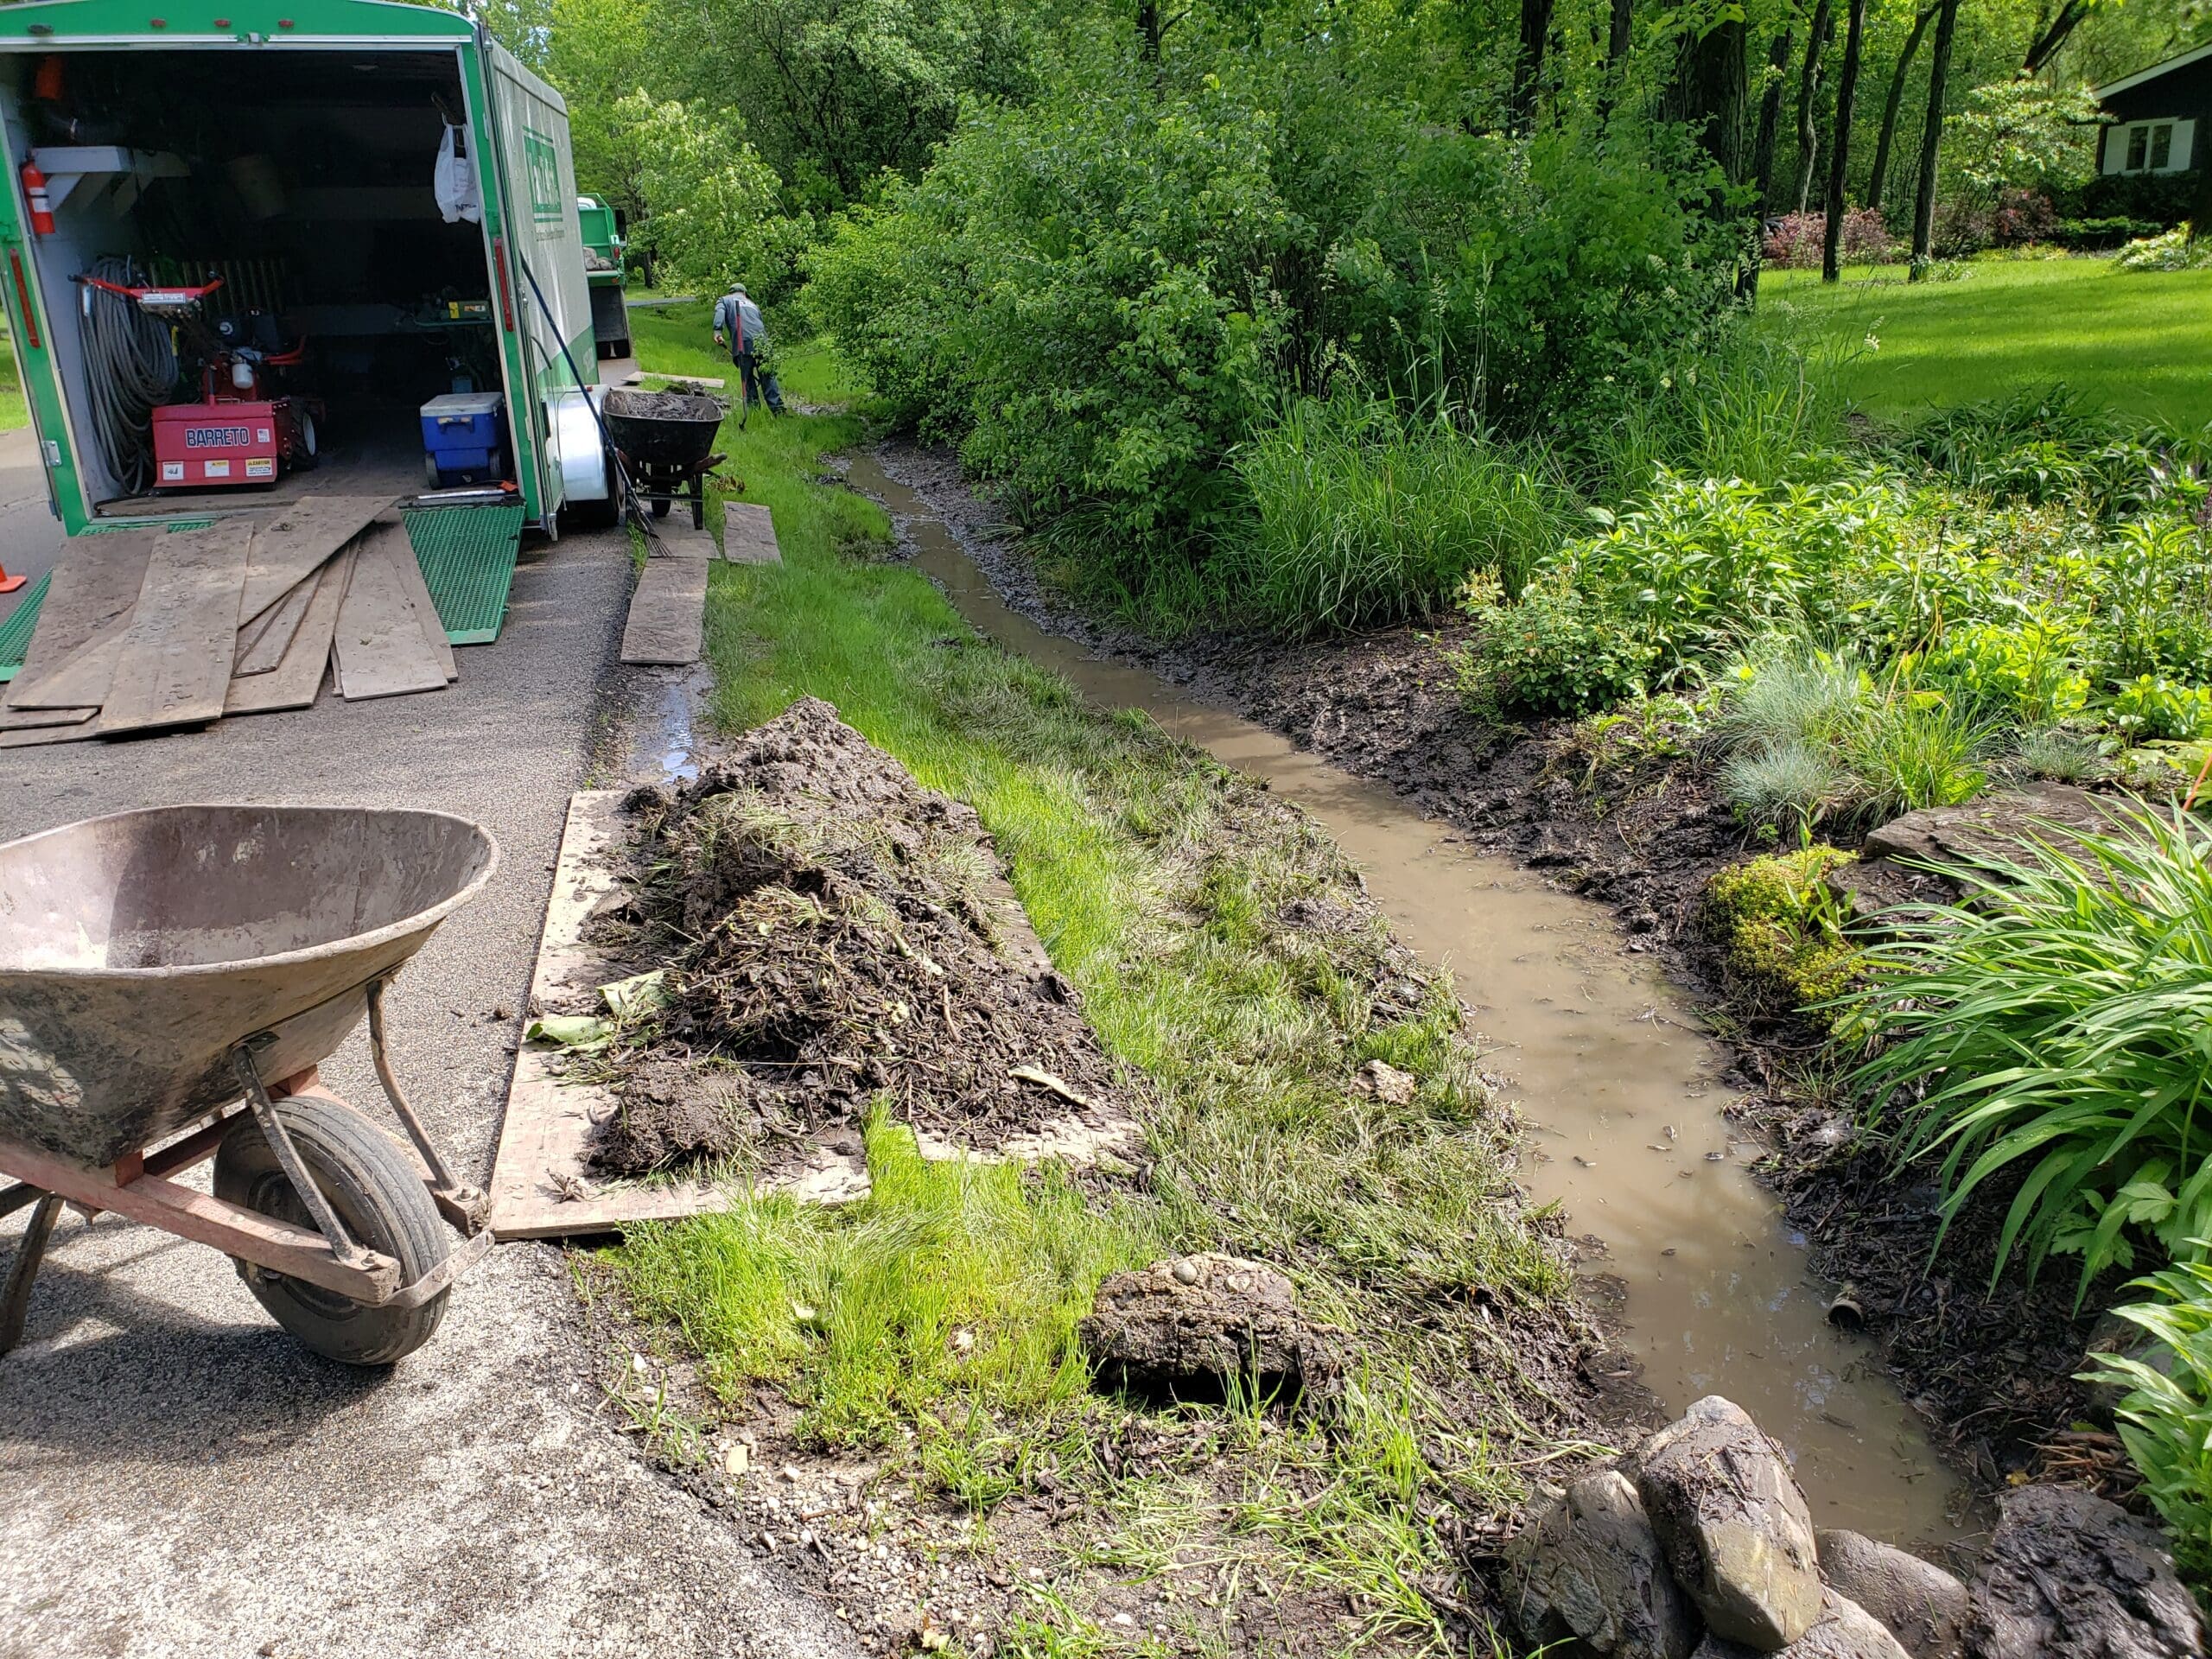
  1. Walkthrough & diagnostics: We follow the water, identify bottlenecks, and document elevations.
  2. Concept & estimate: We outline a mix of strategies (grading, swales, permeable surfaces, subsurface relief) with a clear scope and budget.
  3. Detailed plan & scheduling: We finalize routes, materials, and plantings; confirm any approvals; and schedule work with fall weather in mind.
  4. Installation & protection: We protect existing plantings and hardscape while we trench, grade, or pave.
  5. Finishing touches: Stone selection, planting, and clean-up ensure the end result looks polished—not like a “repair.”
  6. Maintenance guidance: Simple seasonal tasks keep everything flowing: leaf management, quick inlet/outlet checks, and fall-to-winter prep.

Bottom Line: Fix the Water, Elevate the Landscape

Good drainage isn’t just functional; it’s foundational. Done well, it protects your home, preserves your hardscape, and unlocks new design opportunities—especially visible when winter rolls in and water has nowhere to hide. From regrading and rain gardens to permeable surfaces and French drains, the right mix solves the problem and makes your property feel better to live in.

If you’re in Highland Park, Northbrook, or anywhere on the North Shore, we’re here to help you choose the smartest path forward—one that works in October and still looks great in April. Let’s walk the property together, map the water, and design a fix that lasts.

Ready to get started? Reach out and tell us what you’re seeing after fall rains. We’ll take it from there. Contact us today.


backyard drainage

drainage problems

clay paver path to front entrance

Seasonal Maintenance Checklists: Yearly Service Plans

Taking care of a lawn on the North Shore isn’t a once-a-year chore — it’s an ongoing process that changes with the seasons. A quick cleanup might make things look better for a little while, but true health and curb appeal come from consistent, year-round care. Just like people need different things in spring, summer, fall, and winter, so do lawns and landscapes. With a structured yearly service plan, you can avoid costly mistakes, protect your investment, and enjoy a beautiful outdoor space every month of the year.


Table of Contents

  1. Introduction: Why Yearly Service Plans Matter

  2. Spring Maintenance Checklist

  3. Summer Maintenance Checklist

  4. Fall Maintenance Checklist

  5. Winter Maintenance Checklist

  6. The Role of Preventive Care

  7. Why a Yearly Plan Pays Off

  8. How Van Zelst Supports North Shore Homeowners

  9. Conclusion & Next Steps


Introduction: Why Yearly Service Plans Matter

Your lawn and landscape are living systems that change with the seasons. In spring, new growth needs nurturing. In summer, heat and activity create stress. In fall, your landscape needs time to recover and prepare. And in winter, the focus shifts to protecting and planning. Without a structured plan, it’s easy to miss a step that could have long-term consequences. Yearly service plans keep everything on schedule, safeguarding your property while making sure your home looks great year-round.


Spring Maintenance Checklist

large lawn with surrounding beds

Spring is the season of renewal. After months of cold weather, the soil starts to thaw and plants begin to wake up. The way you treat your lawn now sets the tone for the entire year.

Key tasks include:

  • Aeration: Loosen compacted soil so roots can breathe.

  • Fertilization: Apply the right nutrients to jumpstart healthy, green growth.

  • Mulching: Refresh mulch beds to conserve moisture and block weeds.

  • Pruning: Remove damaged or dead branches to keep plants in shape.

  • Weed Prevention: Apply pre-emergent treatments before weeds have a chance to spread.

For more seasonal inspiration, Better Homes & Gardens shares practical spring yard care tips that align with these essentials.


Summer Maintenance Checklist

Summer is when lawns see the most stress. Long, hot days combined with high humidity can take a toll. This is the season when regular maintenance makes all the difference.

Summer checklist:

  • Irrigation checks: Inspect sprinklers to make sure every area gets coverage.

  • Deep watering: Water less often but more thoroughly to encourage strong roots.

  • Pest monitoring: Keep an eye out for grubs, insects, and fungus.

  • Mowing practices: Keep grass at a slightly higher setting to protect roots.

  • Soil testing: Use soil results to fine-tune your fertilization plan.


Fall Maintenance Checklist

Fall is when your lawn really shows whether it got the right care earlier in the year. It’s also your chance to repair summer wear and set yourself up for success next spring.

Fall tasks include:

  • Overseeding: Fill in thin or bare patches for a fuller, stronger lawn.

  • Leaf cleanup: Prevent suffocation and fungal growth by removing fallen leaves.

  • Fertilization: Apply a fall blend to strengthen roots before winter.

  • Winter prep: Protect delicate plants and drain irrigation systems.

  • Soil enrichment: Add compost or organic material to boost soil health long term.


Winter Maintenance Checklist

Holiday containers

Winter on the North Shore means snow, ice, and freezing temperatures. While it may seem like downtime, this season still matters for your landscape.

Winter service plans often include:

  • Snow & ice management: Keep walkways safe without harming beds or turf.

  • Dormant pruning: Trim trees and shrubs while growth is paused to set them up for spring.

  • Hardscape protection: Inspect patios and walkways for cracks before they worsen.

  • Equipment servicing: Tune up lawnmowers, snow blowers, and irrigation systems.

  • Landscape planning: Use this quieter time to map out spring projects.

By tackling these items early, you reduce winter damage and make sure your property is ready to thrive when warm weather returns.


The Role of Preventive Care

A yearly plan isn’t just about fixing problems as they appear. Preventive care is about reducing the chance of emergencies — like pest outbreaks, soil depletion, or plant failure — before they happen. Small, regular steps like aeration, overseeding, and seasonal fertilization protect your investment and keep your property strong. Think of it like insurance for your lawn’s long-term health.


Why a Yearly Plan Pays Off

The benefits of sticking to a structured lawn plan go beyond convenience.

Here’s why it pays off:

  • Consistency: Every task gets handled on time.

  • Stronger growth: Healthy lawns and plants bounce back faster after stress.

  • Higher property value: Well-maintained landscapes boost curb appeal and resale potential.

  • Cost savings: Preventive work reduces the chance of expensive repairs.

  • Peace of mind: You can relax knowing your property is in good hands.


How Van Zelst Supports North Shore Homeowners

At Van Zelst Landscaping, we’ve supported North Shore homeowners for decades with tailored seasonal care. For example, our Chicago landscape design work shows how thoughtful planning and collaboration can completely reshape an outdoor space, balancing artistry, architecture, and the way families actually use their yards. Likewise, our Northbrook landscaping projects highlight the full-service approach our clients count on — from design and installation to ongoing maintenance that keeps properties thriving year after year. Whether you’re considering a new project or simply want consistent seasonal upkeep, our team understands the unique challenges of the region and brings that experience to every client we serve.


Conclusion & Next Steps

A beautiful lawn doesn’t just happen on its own — it’s the result of consistent, thoughtful care all year long. Yearly service plans keep your lawn, garden, and hardscapes strong and ready for whatever the Midwest climate throws their way. For North Shore homeowners, this approach delivers long-lasting value, healthier outdoor spaces, and greater peace of mind.

If you’re ready to take your property to the next level, contact Van Zelst today. Our decades of experience and seasonal expertise will keep your landscape thriving year after year.

How to Fix Backyard Drainage Problems The Right Way

This saying is true, but it also reveals any drainage issues that may be present in the landscape.  Tackle them now so that you can enjoy the rest of the season in your garden.

April showers bring May flowers

Design Foundations

With 40 years of experience, we can tell you that the first consideration when designing any substantial property enhancement is water management.  From the first semester in a design program we were taught to mitigate water on a property. To be able to show it graphically; as to not endanger the house, not direct water irresponsibly onto adjacent properties and to ensure that standing water does not exist for an extended period after a rain event.

From a business and sales standpoint, calls about drainage problems are welcomed in the industry because they present a high priority service necessity, rather than another landscape enhancement that may be a luxury.  Water problems, if left unattended, could threaten a home to the point of doing tens of thousands of dollars of damage. For this reason, many homeowners will place absolving water problems as the highest item on their home improvement list.

As a designer, solving drainage issues in a creative matter has always been a goal of ours.  We strive to look at problems as opportunities to not only improve the situation, but to improve the aesthetics on a property as well.  There are several ways to disperse the water from your property.  As is often the case it is necessary to put pipes in the ground to solve grading and drainage problems. However, there are many cases where an opportunity for an alternate approach could be presented for at least a portion of the drainage enhancement.

When introducing these alternate drainage concepts, in our experience, they are often described in many different terms, depending on who may be describing the size, scope, shape or design intention of the concept.  These terms include; swale, dry stream-bed, rain garden, bioswale, open french drain or even “old riverbed”. They are all designed to accomplish 4 basic goals:

  1. To move water from one area of the landscape to another
  2. To detain water in a designated area where it may be absorbed into the ground over a larger area
  3. To reduce maintenance related problems in an area of extreme moisture
  4. To look aesthetically pleasing and natural

Essential Elements of Successful Drainage

There are a number of rules to follow when it comes to designing a drainage solution on a property. It is always best to get a copy of the client’s topographical site plan and if this is not available, at a minimum a plat of survey to determine lot lines and location of easements or public sidewalks.  Some communities require permitting for drainage work, and in this case, local codes vary regarding the distance from a drain line outlet to a public sidewalk or lot line. Examples of this kind of code stipulation are; ensuring that the outlet is 10 feet away from a public walk and no less than 5’ away from a property line.  Permits through the building and development office of your township may NOT be required, but it is always best to see what local codes dictate. Some communities even require silt fencing, engineer stamped grading and drainage plans, or permission to commence the work from a Home Owners Association.

Once the issue of permits is determined, design can commence.  Designs will address any requirements that the permit dictates.  If a permit is NOT required, minimum design standards will include illustrations to indicate the following elements on the drainage plan; location of all downspouts, location of sump pump outlet, installation of any solid or perforated pipe, location of intended swales and the direction of water flow, intended detention areas and location of ejector pump if necessary.  Additionally, a cross section of the connection from downspouts to any underground pipes could be helpful to communicate to the client or the installation crew.

Included in this cross section would be the detail showing the essential element of successful drainage, which is an air gap that must exist in our freezing environment to prevent downspout back-up or sump pump back-up.  When pipes holding water slowly freeze over time due to freeze/thaw cycles, the positive flow of water away from the home ceases to exist and the water coming from the downspout or sump pump needs a place to exit, even if it is at the foundation of the house.  For this reason, it is also essential to have proper grading around the foundation to ensure that surface water is flowing away from the house.

Lemons to Lemonade

Multiple times in the 2019 season, the team at Van Zelst turned a wet, often unsightly and difficult to maintain area of the landscape into a new, naturally irrigated area of the property enhancing the overall aesthetic on the site.  New opportunities for color through revolving perennial blooms, to give the landscape an element of form and movement utilizing ornamental grasses and flowering shrubs and providing winter interest through evergreen species. All of these clients have reacted positively to the change and were pleasantly surprised by the positive impact a surface drain can have on the property, when they thought they would be spending their money on just putting pipes into the ground, rather than creating a whole new garden opportunity.

The most typical landscape rock used for creating dry stream-beds is what  we commonly refer to as washed gravel, river rock or Grade #6 stone. Essentially, this is stone with 1/2”-2”, rounded shape with no fines in the mix.  Occasionally,when we are solving a drainage problem with permeable paving, we use CA #7, or angular ¾” chip with no fines as a drainage medium. The reason for the angular stone is that it compacts more effectively and it performs as a perfect base for permeable pavers.  On top of these types of functional drainage stone, we typically use a more desirable and colorful gravel which we refer to as red flint. Additionally, various sizes of rounded cobbles and boulders are used to closely imitate the type and size of rock seen in streams and rivers.

Once the intended plant material fills in the areas surrounding the new dry stream-bed, these become easy to maintain areas of the property and successfully move water away from the house into a practical and legal outlet area, improving the landscapes function and value.